A Praying Mantis Breeder’s Journal: From Pairing to Ootheca in 60 Days
Published on: January 13, 2026 | Last Updated: January 13, 2026
Written By: Rowan Hale
Hello, mantis friend! Have you ever watched a praying mantis pair up and wondered about the delicate steps that lead to a precious ootheca? This journal walks you through the full 60-day breeding cycle, sharing firsthand insights from pairing to ootheca formation.
Breeding mantises isn’t always straightforward-it demands attention to timing, environment, and individual behavior. We’ll break it down into manageable parts, so you feel confident every step of the way.
Here are the key takeaways you can expect:
- How to choose and introduce a healthy mantis pair safely
- Monitoring courtship and mating to reduce risks
- Caring for the female post-mating to support ootheca development
- Recognizing when an ootheca is ready and how to protect it
Preparing Your Mantises for Successful Breeding
Before we bring mantises together, we take time to ensure they are well-suited and ready for breeding. Selecting the right species and confirming their health sets the stage for a smooth, stress-free experience for both you and your mantises.
- Choose species known for calm temperaments and straightforward breeding habits to reduce risks.
- Verify that both male and female mantises are mature adults, typically after their final molt, to avoid pairing too early.
- Gather key supplies: separate enclosures for housing, small feeders like fruit flies or crickets, and a fine misting bottle for humidity control.
Choosing the Right Species
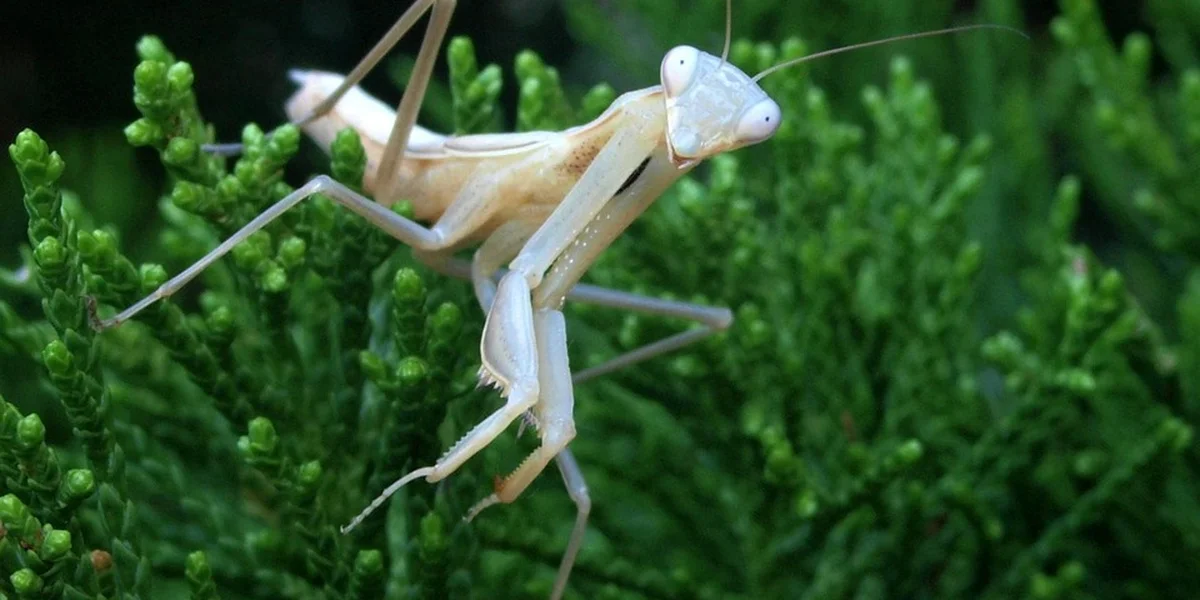
We often start with species that are gentle and less prone to aggression, making breeding safer and more predictable. Ghost Mantises, like my Luna, tend to be slow-moving and less likely to attack mates, while Giant Asian Mantises such as Moss can be more energetic but still manageable with care.
- Ghost Mantis: Ideal for beginners; their leaf-like appearance and docile nature mean fewer cannibalism worries.
- Giant Asian Mantis: A good choice for those with some experience; they breed readily but may need closer monitoring during introductions.
- Orchid Mantis: Beautiful but delicate; best for advanced keepers due to their specific humidity needs and occasional shyness, as seen with my Sprig.
Look for species where males and females show mutual tolerance, avoiding those with highly aggressive females that might see mates as prey. By picking compatible pairs, you create a calmer environment that encourages natural mating behaviors without constant fear.
Health and Readiness Assessment
A healthy mantis moves with purpose, has clear eyes, and a plump abdomen from regular feeding. Check for full wing development in adults, which signals maturity and readiness for breeding, much like Moss’s vibrant green wings when he reached adulthood.
- Observe feeding response: Offer a small insect and watch for a quick, accurate strike-this shows good appetite and alertness.
- Monitor activity level: A mantis that perch-hops or explores its enclosure is likely in prime condition, while lethargy could indicate illness.
- Look for physical signs: No missing limbs, smooth exoskeleton, and steady grip on branches-these are all indicators of robust health.
We gently assess each mantis over a few days to ensure consistency in behavior before pairing. This careful observation helps prevent stress during mating and increases the chances of a successful outcome. Understanding the mating process is crucial for success.
The Pairing and Mating Process Step-by-Step
- Set up a neutral introduction space with minimal decorations to reduce territorial behavior and allow easy monitoring.
- Monitor initial interactions for safety, keeping a close eye for any signs of aggression like rapid lunges or raised forelegs.
- Observe mating behavior and duration, noting gentle touches and the male’s approach, which can last from minutes to hours depending on the species.
- Separate pair post-mating to prevent cannibalism, using a soft brush or container to gently move the male to his own enclosure.
Creating a Safe Introduction Environment
We use a simple, clean enclosure with partitions or visual barriers, such as a piece of mesh or a small plant, to let mantises see each other without immediate contact. For breeding, use a dedicated, well-ventilated setup sized to prevent overcrowding and to allow discreet courtship. This setup mimics natural cautious encounters and reduces the risk of sudden attacks, giving both mantises time to adjust.
- Temperature: Maintain a range of 22-26°C (72-79°F) for most species, using a small heat mat if needed to keep things cozy.
- Humidity: Aim for 50-70% relative humidity, achieved with light misting-think of the fresh, damp scent after a gentle rain in a forest.
Add a few sturdy branches or leaves for perching, but avoid clutter that could lead to accidental collisions. Create a naturalistic, safe habitat for your praying mantis by mimicking its native surroundings. A realistic setup helps reduce stress and encourages natural behaviors. By controlling the environment, you help the mantises feel secure and focused on mating rather than defense.
Recognizing Successful Mating Cues
Watch for the male’s slow, deliberate approach, often with gentle antennae touches, and the female’s receptive posture-she may stay still or slightly arch her body. These subtle behaviors, like the way Luna tilts her head before accepting a mate, signal that breeding is progressing smoothly.
- Behavioral signs: Soft swaying movements, prolonged contact, and the male mounting the female without resistance.
- Average mating times: Ghost Mantises may take 2-4 hours, while Giant Asian Mantises like Moss often complete in 1-3 hours; Orchid Mantises can be quicker but vary widely.
If the female remains calm and the pair stays connected, it is a good indicator of success. Noting these cues helps you intervene only if needed, ensuring the process feels natural and unhurried for your mantises.
Ootheca Development and Care After Mating
After a successful mating, your female mantis will begin developing her ootheca, which is the foamy egg case she lays to protect her future nymphs. Most species take between one to three weeks to produce and deposit their first ootheca, with factors like species, temperature, and the female’s health influencing the exact timing. For instance, my Ghost Mantis Luna typically laid hers about twelve days post-mating, often during the quieter evening hours when she felt secure.
Females seek out specific surfaces to attach their oothecae, preferring rough, textured spots that provide stability. Ideal locations include twigs, bark, mesh screen sides of enclosures, or even sturdy plant stems, as these allow the foam to harden properly and resist falling. In our setups, we often add a small branch or a piece of cork bark angled slightly upward, which mimics natural settings and gives her plenty of options.
Keeping a close eye on your female during this phase helps ensure she stays healthy and stress-free. Watch for normal behaviors like regular feeding and occasional grooming, and note any signs of lethargy or refusal to eat, which could indicate she needs adjustments in care. We check our mantises daily, offering gentle mists and observing their posture-a content female will often perch calmly, while a stressed one might pace or avoid her usual spots.
Supporting the Female Post-Mating
Feeding becomes especially important after mating, as the female uses extra energy to form eggs. Offer prey every two to three days, focusing on nutritious options like fruit flies, small crickets, or hatchling roaches to support robust egg development. With Moss, my Giant Asian Mantis, we noticed he appreciated slightly larger meals during this time, though we always avoid overfeeding to prevent obesity.
Adjusting humidity and temperature can make a big difference in her comfort and egg viability. Aim for a slight increase in humidity-around 60-70% for many species-by misting the enclosure lightly each day, and maintain temperatures between 22-28°C to mimic a warm, stable environment. We use a small hygrometer to track levels, and on cooler days, a low-wattage heat mat placed nearby helps keep things consistent without overheating.
Handling and Relocating Oothecae
If you must move an ootheca, do so with extreme care to avoid damaging the delicate structure. Gently slide a soft artist’s brush or blunt tweezers under the base, supporting it fully, and transfer it to a similar surface in its new location without twisting or pulling. We’ve found that waiting at least 24 hours after laying allows the foam to harden, reducing the risk of collapse.
Avoid disturbing freshly laid oothecae whenever possible, as this can cause the female stress or lead to abandonment. Fresh oothecae are soft and vulnerable; even slight jostling might crack the outer layer and expose the eggs to mold or dehydration. In our experience, it’s best to observe from a distance initially, and only intervene if the placement poses a clear danger, like being too close to heat sources.
Incubation and the 60-Day Wait for Hatching
-
Set up a small, ventilated container-like a deli cup with fine mesh holes-to hold the ootheca securely. Good airflow prevents mold while keeping humidity stable, so we often use containers with lids that have pre-drilled holes or mesh inserts.
-
Different mantis species require different temperature and humidity ranges. Knowing your species’ exact needs helps tailor the care. Maintain consistent temperature and humidity based on your mantis species’ needs. Check levels daily with a thermometer and hygrometer, making small adjustments with misting or slight heating if needed to avoid fluctuations.
-
Record the expected hatch date in a journal or calendar, using average incubation periods for guidance. This helps you anticipate the big day and spot any delays early, so you’re prepared for the nymphs’ arrival.
-
Watch for tiny splits or darkening in the ootheca, which signal that nymphs are about to emerge. These signs usually appear within a day or two of hatching, giving you time to set up their new enclosures with food and water sources.
Ideal Incubation Conditions
Temperature ranges vary by species, but most common mantises thrive between 24-30°C during incubation. For Ghost Mantises like Luna, we keep it around 25°C, while Giant Asian types like Moss do well at 26-28°C to encourage timely development. Consistency is key-sudden drops or spikes can delay hatching or reduce nymph survival rates.
Humidity should be monitored closely to prevent the ootheca from drying out or growing mold. Aim for 50-70% humidity, misting lightly if it drops, and ensure the container isn’t airtight to allow moisture to escape and avoid condensation buildup. We use a simple spray bottle with distilled water to maintain this, checking that the ootheca feels slightly damp but not wet to the touch.
Predicting and Tracking Hatch Dates
Average incubation periods differ among mantis types, giving you a rough timeline to work with. So, how long does it take praying mantis eggs to hatch? Ghost Mantises often hatch in 4-6 weeks, Giant Asians in 6-8 weeks, and Orchid Mantises like Sprig can take 5-7 weeks under ideal conditions. These estimates help you plan ahead, but remember that individual variations are common, so patience is essential.
Using a dedicated journal or digital calendar makes tracking easier and adds a personal touch to the process. Note the laying date, any environmental changes, and observations – this not only helps predict hatching but also builds your experience for future breeding cycles. Consider pairing this with a simple six-week countdown checklist to track milestones toward hatching day. By week six, you’ll be ready to observe the hatching day and note any outcomes. We jot down notes weekly, and it’s rewarding to look back and see how each ootheca progresses over the weeks.
Keeping a Detailed Breeder’s Journal
Maintaining a dedicated journal transforms breeding from hopeful guessing into a precise science. A consistent log becomes your most trusted advisor, revealing patterns you’d otherwise miss in the daily routine.
We treat ours like a field notebook, filled with scribbles and observations that build a complete story over time.
- Date: The anchor for every entry.
- Species: Critical for tracking species-specific behaviors.
- Pair IDs: Note individual names or identifiers.
- Enclosure Size: Record dimensions and setup.
- Temperature & Humidity: Log daily ranges.
- Food Type & Feeding Frequency: What and how often you offer prey.
Beyond raw data, your observational notes are pure gold. Jot down everything from a female’s restless pacing before laying an ootheca to the vibrant green hue of a well-fed nymph.
These small details create a living history of your colony’s health and habits.
Essential Journal Entries for Each Stage
During the pairing stage, your notes need sharp focus. We always document the exact moment mating is observed, noting the male’s approach and the female’s receptiveness.
- Mating Observed: Date, time, and duration.
- Ootheca Produced: Date the first foam mass appears.
- Ootheca Count: Total number from that pairing.
- Ootheca Location: Where she chose to deposit it.
Once you have oothecae, your logging shifts to incubation. Tracking the incubation period helps you predict the magical hatch day with surprising accuracy.
- Incubation Period: Days from ootheca completion.
- Predicted Hatch Date: Based on species averages.
- Actual Hatch Date: The real arrival of your nymphs.
Post-Hatching Data and Analysis
When the tiny mantises emerge, your journal becomes a nursery log. We make a simple headcount of nymphs hatched, which gives you a baseline for your colony’s size.
- Nymphs Hatched: An initial rough estimate.
- Mortality Rates: Track losses in the first critical week.
- Health Notes: Document any deformities or weak individuals.
The real power of your journal emerges during review. Looking back at previous breeding attempts highlights what worked and what needs refinement for your next pairing.
You might notice that pairs fed on fruit flies produced smaller oothecae, prompting a switch to larger prey.
Troubleshooting Common Breeding Challenges
Even with perfect preparation, breeding doesn’t always go to plan. Failed mating attempts are a common frustration, often linked to subtle environmental cues we overlook.
If a female consistently rejects males, check your temperature gradients and light cycles first.
- Failed Mating: Often due to immature individuals or incorrect humidity.
- Ootheca Non-Production: Can signal nutritional deficits or stress.
- Low Hatch Rates: Usually points to incubation conditions being off.
Simple adjustments can make a world of difference. We once solved a low hatch rate issue simply by moving oothecae a few inches away from the heat source for a more stable temperature.
Sometimes the solution is as straightforward as offering more variety in their diet.
Dealing with Aggression or Cannibalism
Cannibalism is a real risk during pairing, but you can minimize it with careful strategy. We always feed the female heavily right before introducing the male, satisfying her hunting instincts.
- Use a large, well-planted enclosure to provide escape routes.
- Monitor closely and have a catch cup ready for quick separation.
- Introduce the male when the female is calm and stationary.
Knowing when to abort an attempt is just as important as starting one. If the female displays aggressive posturing or actively chases the male, immediately separate them and try another day.
Our male Moss once escaped a particularly feisty female by leaping onto a branch we’d strategically placed for that purpose.
Managing Ootheca Health Problems
Healthy oothecae should look firm and creamy, sometimes with a subtle sheen. Infertile oothecae often appear smaller, misshapen, or discolored compared to healthy ones.
Mold presents as fuzzy white or green patches and requires immediate attention.
- Infertile Oothecae: Typically smaller and may collapse over time.
- Mold Issues: Caused by excessive moisture and poor ventilation.
Corrective measures can often salvage a problematic ootheca. For minor mold, we gently brush it off and slightly reduce humidity while increasing air flow around the egg case.
Sometimes moving the ootheca to a slightly warmer spot can stimulate proper development if temperatures were too cool.
Common Mantis Queries
How do subspecies variations impact mantis breeding?
Subspecies can have unique temperature and humidity needs, which may affect mating behavior and ootheca viability. Researching these specifics helps tailor your setup for better breeding outcomes.
Why is it important to assign unique Pair IDs in a breeder’s journal?
Unique Pair IDs allow you to track individual mantis lineages and behaviors across multiple breeding attempts. This helps identify successful pairs and avoid genetic issues over time.
What factors commonly influence nymph mortality rates after hatching?
Nymph mortality often increases due to unstable humidity or inappropriate prey size for their small mouths. Maintaining consistent conditions and providing tiny feeders like fruit flies can improve survival.
Your Mantis Breeding Adventure Awaits
Focus on gentle introductions and a calm habitat to reduce stress during pairing. To safely introduce male and female mantises for breeding, begin with a supervised neutral-area meeting and monitor closely. If either shows stress, separate and retry after they calm. Consistent warmth and regular feeding help your female mantis feel secure enough to lay her ootheca within those 60 days.
We encourage you to always observe your mantis’s behaviour and adjust care as needed for their comfort. Within the care for pet praying mantis complete handling behavior guide, you’ll find practical steps and safety tips for gentle handling and well-being. Staying curious and connected with fellow breeders enriches your journey in pet mantis care.
Further Reading & Sources
- Ootheca Life Cycle Praying Mantis Egg – USMANTIS
- Praying Mantis Egg Case: All About Mantid Oothecae
- Caring for mantis ootheca and eggs | Keeping Insects
- Everything you need to know about an ootheca – Insektenliebe
Rowan Hale is a lifelong insect enthusiast who fell in love with mantises for their calm presence, alien elegance, and surprising personalities. After years of keeping and raising a variety of species, Rowan shares practical tips, creative insights, and real-world experience to help others enjoy the quiet magic of mantis care. From setting up the perfect enclosure to understanding their subtle behaviors, Rowan invites readers into a gentle, curious world where every tiny movement feels like a discovery.
Breeding Practices