How to Breed Mantis Species Successfully: A Step-by-Step Guide
Published on: December 5, 2025 | Last Updated: December 5, 2025
Written By: Rowan Hale
Hello, fellow mantis friend. Picture the moment a new ootheca, firm and patterned like ancient bark, settles in your care-the quiet beginning of a tiny, green world.
Breeding mantis successfully is a practiced art of matching nature’s timing with your attentive care, from selecting robust adults to fostering the first delicate nymphs.
It’s a nuanced process where a missed cue or slight environmental shift can change the outcome, especially across diverse species from the patient ghost to the vibrant orchid mantis.
We’ll walk through each phase together. Here are the core steps to expect:
- Picking compatible, well-fed adults ready for breeding
- Preparing tranquil, species-specific enclosures to reduce stress
- Managing the careful introduction and mating ritual
- Ootheca care, from placement to ideal hatching conditions
- Early nymph setup with proper food and humidity
Laying the Groundwork: Species Selection and Pre-Breeding Care
Choosing Your Mantis Breeding Partners
Your first decision is the most exciting: which species to welcome into your breeding project. We always suggest starting with a species known for being cooperative and hardy, where the care requirements are well-documented and manageable. Beginning with a forgiving species builds your confidence and lets you learn the rhythms of mantis breeding without undue stress. Choosing the right species for beginners is essential for starting off on the right foot.
Consider these popular choices for first-time breeders:
- Giant Asian Mantis (Hierodula membranacea): A robust, green powerhouse. They are prolific, with females producing large oothecae (egg cases), and their care is straightforward. My male Moss was a Giant Asian, always active and a reliable feeder.
- Ghost Mantis (Phyllocrania paradoxa): Smaller and exquisitely camouflaged. They are generally placid with each other, which can make the introduction process less nerve-wracking. My Ghost mantis, Luna, moves with a deliberate calm that is perfect for observing behaviours.
- African Mantis (Sphodromantis lineola): Another excellent, hardy candidate. They are often bold feeders and adapt well to typical room temperatures.
Steer clear of highly cannibalistic or extremely delicate species for your first attempt. The goal is a successful, positive experience for both you and your mantises.
Sexing Mantises: Confidently Identifying Males and Females
Before anything else, you must be absolutely certain of your mantises’ sexes. Mistaking two females or two males for a pair is a common early stumble. Accurate sexing prevents wasted time and ensures you have a compatible duo ready for courtship. Wait until they are at least sub-adults (one molt before adulthood) for the clearest signs.
Look for these key differences:
- Abdominal Segments: This is the most reliable method. Gently examine the underside of the abdomen’s tip. Females typically have six visible segments, while males have eight. The male’s extra segments create a slimmer, more tapered look.
- Body Size and Shape: In most species, adult females are significantly larger and bulkier than males. Males tend to be slender with longer, more delicate wings relative to their body.
- Antennae: Males often have longer, bushier antennae to help them detect female pheromones from a distance.
Practice this on your mantises as they grow. That quiet moment of checking Luna’s segments confirmed her as female, a small but vital piece of knowledge for planning her care.
Pre-Breeding Husbandry: Optimizing Health and Diet
Think of the weeks before breeding as a conditioning period. You are preparing athletes, not just pets. Both partners, especially the female, need to be in peak physical condition. A well-fed, healthy female is more likely to produce a fertile ootheca and is slightly less likely to view her mate as a mere snack.
Follow this pre-breeding regimen for 2-3 weeks:
- Boost the Female’s Diet: Increase her feeding frequency. Offer nutrient-rich prey like gut-loaded crickets or dubia roaches every other day, allowing her to build fat reserves for egg production.
- Condition the Male: Ensure the male is also feeding well and is agile. His fitness is crucial for a successful aerial approach and mating performance.
- Provide Constant Hydration: Mist the enclosure lightly daily. Proper hydration is vital for the female to form the frothy substance that becomes the ootheca.
- Review Housing: Keep them in their separate, optimal enclosures during this time. Stability and absence of stress are your tools here.
Crafting the Breeding Sanctuary: Enclosure Setup and Climate
Terrarium Size and Setup for Breeding Pairs
The breeding enclosure is a temporary stage, not a permanent home. Its design prioritizes safety, space for flight, and easy observation. A spacious, vertically-oriented terrarium gives the male room to execute his cautious approach and provides escape routes, which can be lifesaving.
A standard 30cm cube terrarium or a tall exo-terra style glass tank works beautifully. Focus on the interior:
- Vertical Branches: Create a network of slender sticks and branches reaching the top. The male will often observe from a high point.
- Foliage at the Top: Place fake or safe live plants near the ceiling. This offers the female a perch and a potential anchor point for her ootheca later.
- Minimal Floor Clutter: Keep the ground clear. You want to see exactly what is happening without obstructions.
Set this enclosure up and let it stabilise for a day before introducing your mantises. A familiar, calm environment matters. Be mindful of the top 10 enclosure setup mistakes that secretly stress your mantis; avoiding them helps keep your mantises comfortable from the start.
Dialing in Temperature and Humidity
Climate cues can trigger natural breeding behaviour. Mimic the gentle warmth and moisture of a favourable season. Consistent, species-appropriate warmth encourages activity and metabolic processes essential for reproduction.
Use a small heat mat on one side of the glass (never underneath) or a low-wattage ceramic bulb to create a gradient. Aim for the high end of your species’ preferred range:
- For Giant Asian or African mantises, try 25-28°C during the day.
- For Ghost mantises, a slightly cooler 24-26°C is perfect.
Humidity is equally critical. The female needs moisture in the air to produce her ootheca. Light, frequent misting creates the humid, earthy atmosphere that signals ideal conditions for egg-laying. Target 60-70% humidity, spiking after mistings. A simple digital hygrometer takes the guesswork away.
Ensuring Proper Ventilation and Gentle Lighting
Stale, stagnant air is a danger in a humid breeding setup. It encourages mould, which can attack a freshly laid ootheca. Good cross-ventilation keeps the air fresh and moving, protecting both your mantises and their future offspring.
Mesh panels on the top and part of the sides are ideal. You should feel a slight air exchange. Lighting should be soft and naturalistic. Avoid bright, hot lights directly on the enclosure. Indirect daylight from a window or a gentle LED strip on the room’s ceiling provides the day-night cycle they need without causing stress. Watch how Sprig, my orchid mantis, would always settle in a spot of dappled light-it’s a preference they all share for feeling secure and attuned to their world.
The Dance of Mating: Safe Introduction and Rituals

Watching mantises court is like observing a slow, silent ballet in a sun-dappled glade. This delicate ritual requires a keeper’s calm presence and careful timing to ensure both partners remain safe. We will walk through each movement of this natural process, from understanding their instincts to guiding a successful pairing.
Understanding Praying Mantis Mating Behavior
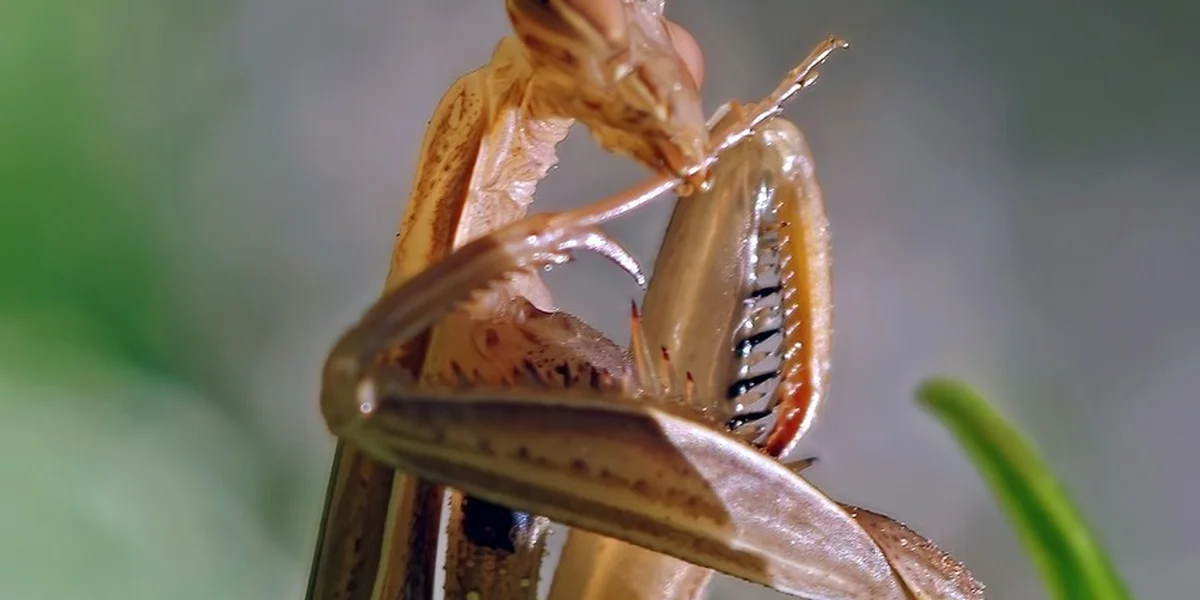
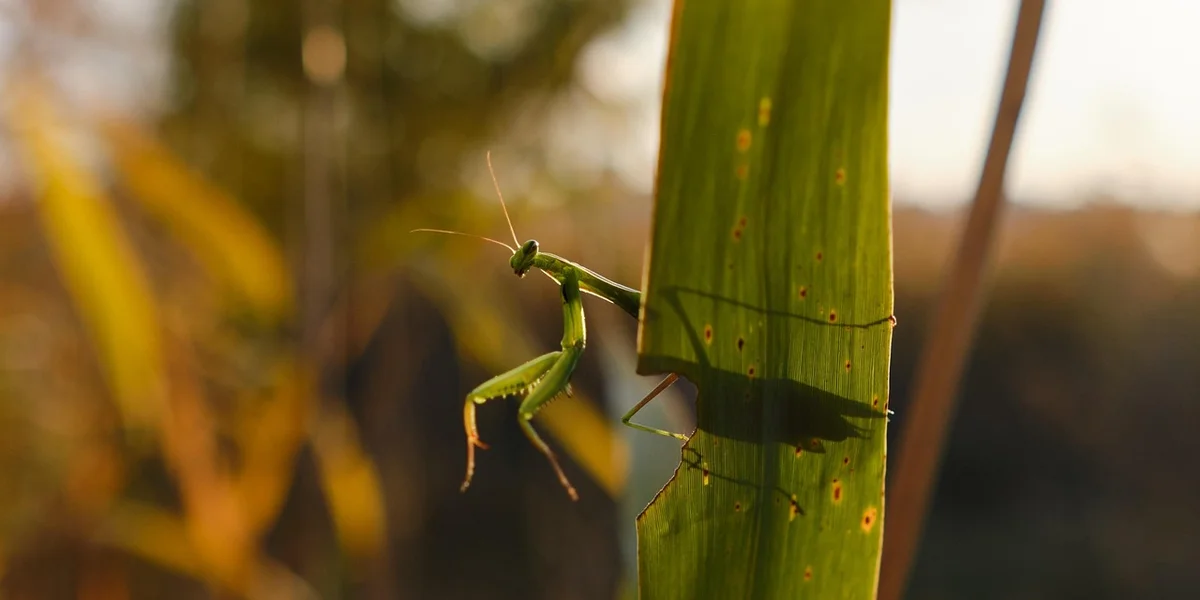
In the wild, mating is a high-stakes dance driven by instinct and opportunity. Males often approach females with a cautious, stalking motion, using their keen vision to judge her receptiveness. You might notice your male, like my Moss, becoming more active, waving his antennae as if testing the air for her scent. Females, when ready, adopt a still, perched posture, but their hunger can quickly turn the dance dangerous. Recognising these subtle cues-the male’s tentative advances, the female’s alert stillness-helps us intervene wisely.
Each species has its own rhythm; Ghost Mantises like Luna court with slow, deliberate movements, whilst larger species may be more direct. Patience here is your greatest tool, as rushing can startle them and trigger defensive strikes. The humid, earthy scent of their enclosures seems to heighten during this time, a natural signal that sets the stage for their meeting.
A Step-by-Step Guide to Safe Pairing
Follow these measured steps to create a controlled environment for introduction. Proper preparation transforms a risky encounter into a manageable, observed event. We have found that success hinges on detail and timing, much like tending a fragile plant.
Step 1: Pre-Mating Preparation and Feeding
Begin by ensuring both mantises are healthy and well-fed, especially the female. Feed the female a substantial meal, like a fat cricket or roach, 24 to 48 hours before introduction to reduce her hunting drive. A satiated female is less likely to view her suitor as food. For the male, offer a lighter meal to keep him energetic but not sluggish. Check that both enclosures have ideal humidity and warmth, mimicking a calm, spring-like morning. I always mist Sprig’s enclosure lightly beforehand, as the gentle moisture seems to soothe her.
Gather your tools: a large, neutral space like a clean terrarium or a spacious box with ventilation, a soft brush for gentle guidance, and a lid for swift separation. Creating this prepared space removes territorial cues and gives you control over the meeting.
Step 2: The Introduction and Supervision Process
Place the female into the neutral space first, allowing her to settle for a few minutes. Then, introduce the male carefully, ideally from a distance so he can approach her slowly on his own terms. Never drop him directly beside her. Stay close and watch without sudden movements; your presence should be as quiet as a shadow. The male may freeze, then begin a rhythmic swaying or a tentative crawl toward her.
If he mounts successfully, mating can last from hours to a full day. Keep a watchful eye throughout, ready with your lid or brush if the female shows aggression, like a sudden lunge or grabbing with her forelegs. During one pairing, Moss stayed perfectly still for hours, his emerald form a statue against a branch, whilst I kept vigil with a warm cup of tea.
Step 3: Post-Mating Separation and Care
Once the male disengages, separate them immediately using your brush or a container. Gently coax the male away and return him to his own enclosure, where he can rest and feed. He may be tired or skittish, so handle him with extra care. Offer both mantises a drink of water via misting and a small, easy meal within a few hours. The female, now possibly gravid, will need consistent nutrition and a stress-free environment. Post-mating care is about providing quiet recovery, much like offering a safe perch after a long flight.
Managing the Risk of Female Cannibalism
This natural behaviour is perhaps the most nerve-wracking part of breeding. While not every female will cannibalise her mate, the risk is real and rooted in survival instinct. To manage it, always supervise introductions and be prepared to intervene. A well-fed female is the first line of defence, but her mood matters too; if she seems overly alert or aggressive, postpone the meeting.
Use the neutral space method to avoid triggering territorial behaviour. If she attacks, a soft brush can often deflect her strike, giving the male a chance to escape. In my experience, providing a distraction, like placing a feeder insect on the opposite side of the space, can sometimes redirect her attention. Remember, cannibalism is not a failure but a natural possibility. Your role is to minimise risks through careful planning, not to eliminate nature’s course entirely. After a successful pairing, both my Luna and Moss have gone on to live healthy, separate lives, with Moss even singing his soft, rhythmic calls weeks later.
Nurturing the Next Generation: Ootheca to Hatchlings
Ootheca Formation and Care After Laying
After a successful mating, your female mantis will begin crafting her ootheca-a frothy, protective egg case that hardens into a sturdy nursery. Watching this process is quite magical; she carefully extrudes a foam from her abdomen, layering in hundreds of tiny eggs before sculpting it into a shape that resembles a tiny loaf of bread or a cluster of seeds. Each species has a distinctive style; my Ghost Mantis, Luna, produces a delicate, brown ootheca with a subtle grain, while Moss, my Giant Asian, creates a larger, blockier case in vibrant green.
Once laid, the ootheca needs minimal but thoughtful care. You must resist the urge to move it immediately, as the foam is soft and easily damaged for the first day or two. After it hardens, you can gently transfer it if needed, using a blunt tool to pry it from the surface, taking care not to squeeze or puncture the case.
Here’s how to care for the ootheca after laying:
- Place it in a well-ventilated container, like a small mesh cage or a jar with holes, to prevent mould.
- Keep it at room temperature, away from direct sunlight or drafts, which can cause drying or cracking.
- Mist the air around it lightly every few days to maintain a hint of humidity, but avoid soaking the ootheca directly.
- Mark the date of laying on the container; this helps you track the incubation period, which varies by species from weeks to months.
Think of the ootheca as a sleeping garden-your job is simply to provide a stable, quiet environment for the life inside to develop.
Incubation Conditions for Mantis Eggs
Incubating mantis eggs is a lesson in patience and precision. The key is replicating the gentle, consistent conditions of a warm spring morning, which triggers the embryos to develop. Most common pet mantis species, like the Giant Asian or Ghost, do well at temperatures between 22°C to 26°C (72°F to 79°F). For my Orchid Mantis, Sprig, I aim for the warmer end of that range to mimic her tropical origins. Humidity matters just as much as temperature—praying mantis eggs need stable moisture to hatch and avoid drying out or mold. I monitor the enclosure’s humidity with a hygrometer to maintain a steady microclimate.
Humidity is equally vital but often misunderstood. Too much moisture invites mould, while too little can desiccate the eggs, so aim for a moderate humidity level of 50% to 60%. You can achieve this by placing a small water dish in the incubation container or using a room humidifier nearby.
| Condition | Ideal Range | Tip for Beginners |
|---|---|---|
| Temperature | 22°C-26°C (72°F-79°F) | Use a simple thermometer; avoid heat mats directly under the ootheca. |
| Humidity | 50%-60% relative humidity | Light misting every 3-4 days is safer than constant dampness. |
| Ventilation | Good air flow | Mesh lids or drilled holes prevent stagnant air and fungal growth. |
| Light | Indirect natural light or low artificial light | Mimics day-night cycles without overheating the eggs. |
Check the ootheca weekly for any signs of discolouration or fuzzy spots, which could indicate mould-if spotted, increase ventilation slightly and reduce misting. Remember, these eggs are resilient; minor fluctuations won’t harm them, but consistency gives the best hatch rates. For a full care guide on praying mantis egg cases (ootheca), see our ootheca care guide.
Preparing for the Hatch: What to Expect
As hatch day approaches, you might notice the ootheca darken or see tiny, shadowy shapes inside-a sure sign that nymphs are getting ready to emerge. This moment is a quiet thrill, akin to waiting for the first sprouts in a seedling tray. Hatching often happens in the morning, with dozens of tiny mantises, called nymphs or L1s, streaming out over a few hours.
Prepare your space beforehand to ensure a smooth transition. Set up a separate rearing enclosure for the hatchlings, as they can be cannibalistic even at this young age. A large, ventilated container with fine mesh or cloth over the top works perfectly. Line the bottom with paper towel for easy cleaning and add a few slender twigs or plastic plants for climbing.
- About a week before the expected hatch, move the ootheca to this prepared enclosure, suspending it from the lid or a branch with thread.
- Have a food source ready: fruit flies (Drosophila) are ideal first meals. Culture them in advance so they’re available immediately.
- Keep a small spray bottle filled with dechlorinated water for gentle misting after the hatch, providing essential droplets for drinking.
- Plan to separate nymphs into individual containers within a day or two to prevent losses from cannibalism.
When hatching begins, resist the urge to interfere; let the nymphs emerge naturally and find their footing on the branches. They’ll be pale and soft at first, hardening over a few hours. My first time with Moss’s hatchlings, I watched in awe as they unfolded like tiny, emerald leaves, each one a perfect miniature of their parent. Feed them within 24 hours, and maintain slightly higher humidity than for adults to support their delicate skins during moults. With this preparation, you’re not just witnessing new life-you’re giving it the best start.
Rearing Mantis Nymphs: The First Crucial Stages
Those tiny, wriggling hatchlings are full of promise, and with a gentle hand, you can guide them toward healthy adulthood. This early period is less about complex routines and more about providing a stable, watchful environment where they can eat, grow, and shed their skin in peace. We remember the first brood from our Ghost mantis, Luna; her offspring moved with a deliberate, slow curiosity that taught us patience above all else.
Setting Up a Nursery Enclosure
Think of the nursery as a starter home-secure, simple, and easy for you to manage. A large mason jar, a small plastic terrarium, or even a repurposed kritter keeper works wonderfully. The key is to balance humidity with airflow, creating a microclimate that mimics a dewy morning leaf.
You will want to line the bottom with a moisture-friendly substrate like coconut fibre or damp paper towel, which holds humidity safely without drowning delicate feet. Add a few slender twigs or soft mesh reaching to the top, giving nymphs plenty of vertical space to hang when molting time arrives. A light daily mist with warm water keeps the air gently humid, and you will often see tiny droplets beading on the sides, a good sign your moisture levels are right.
Here is a simple checklist for your nursery setup:
- Container: Small, with a ventilated lid (mesh is ideal).
- Substrate: Coconut coir or paper towel, lightly damp.
- Climbing Structures: Thin sticks, fake plants, or soft netting.
- Humidity Source: A small spray bottle for daily misting.
- Placement: Keep in a warm, quiet spot away from direct sun.
Feeding Schedule and Live Prey for Nymphs
Newly hatched mantis nymphs have ferocious appetites, but their mouths are incredibly small. Offering the wrong size prey is the most common stumble for new breeders. Your goal is to provide live food that is smaller than the mantis’s head, moving just enough to trigger their hunting instinct without overwhelming them. You can learn more about what baby praying mantis nymphs eat to ensure you’re offering appropriate live food.
Flightless fruit flies (Drosophila melanogaster) are the staple for most species in their first few weeks. When choosing feeder insects, fruit flies vs houseflies is a common question; fruit flies are typically best for the smallest nymphs, while houseflies can provide larger meals as they grow. For slightly larger nymphs, pinhead crickets or tiny aphids from pesticide-free plants work well. We feed our nymphs every other day, offering a few prey items at a time and removing any uneaten ones after a couple of hours to keep the enclosure clean. Observe your mantids; a plump, rounded abdomen means they are well-fed, while a skinny, pinched look signals hunger.
Consider this typical feeding rhythm for early-stage nymphs:
- Days 1-3 after hatching: No feeding needed; they live off yolk sac reserves.
- Days 4-14: Offer flightless fruit flies every two days.
- Week 3 onward: Assess size; upgrade to micro crickets if the nymphs are catching prey easily.
- Always dust prey with a fine calcium powder once a week for stronger exoskeletons.
Supporting Nymphs Through Molting
Molting is when your nymphs are at their most vulnerable, shedding their tight exoskeleton to grow larger. You will know it is coming when they stop eating, become still, and hang upside down from their climbing frame. During this time, your role shifts from caretaker to quiet guardian, minimizing all disturbances. The air should feel humid and still, like the calm after a soft summer rain.
Ensure the enclosure has perfect humidity by misting lightly the evening before you suspect a molt. Do not handle the container or offer food during the molt itself, which can take a few hours; a sudden fall can be fatal for the soft, new mantis beneath. Once the molt is complete, they will rest for a day or two, their fresh skin hardening into a protective shell. After the molt, the mantis needs time to finish hardening; keep the enclosure stable and avoid handling for another day or two. Once the exoskeleton is firm, you can resume light feeding and normal care.
Here are the steps to follow when you see molt signs:
- Step 1: Increase humidity slightly with a gentle mist, avoiding spraying the mantis directly.
- Step 2: Double-check that climbing surfaces are secure and reach the top of the enclosure.
- Step 3: Resist the urge to check on them frequently; trust the process.
- Step 4: After molting, wait at least 24 hours before offering very small, easy prey.
Our Moss, a Giant Asian mantis, once molted during a quiet evening, emerging with vibrant new green banding-a quiet reward for our patient watch. Successful rearing is built on these moments of attentive stillness, where you provide the safety for nature to work its gentle magic.
Troubleshooting Your Mantis Breeding Journey
Even with careful planning, breeding mantises can present a few gentle challenges. Think of this section as your quiet companion, offering practical fixes for common hiccups so your breeding project stays on a calm, confident path. We will walk through health concerns, protect those precious egg cases, and gently address what to do if things unfold differently than expected. We’ll also touch on common problems during praying mantis egg hatching and share quick fixes. That way, you’re ready to address issues before they impact hatch success.
Common Health Issues in Breeding Mantises
Breeding can be a physically demanding time for your mantises, making them more susceptible to stress-related ailments. Spotting early signs of trouble is your best tool for keeping both your male and female in good health throughout the process. A common issue is dehydration, especially for males who may be too nervous to drink after introduction.
Watch for lethargy, sunken eyes, or a reluctance to move. A light, warm mist on the enclosure walls often coaxes a thirsty mantis to take a drink, much like my Ghost mantis Luna would slowly extend her mouthparts to the droplets. Nutritional deficits are another concern; a female forming eggs needs ample nourishment.
- Pre-mating diet: Feed the female particularly well for a week before introduction, offering gut-loaded insects like flies or small crickets.
- Post-mating care: Continue offering food regularly, as she will use the energy to produce a strong, viable ootheca.
- Stress signals: Aggressive pacing, frequent falls, or refusing food can indicate the pairing was too stressful. Separating them immediately is the kindest action.
Maintaining stable, species-appropriate humidity is non-negotiable during this period. An environment that is too dry can lead to failed molts before breeding, while excessive dampness invites fungal growth that can harm both adults and eggs. Use a hygrometer and adjust your misting routine with a gentle, observant hand.
Preventing Egg Case Predation and Other Risks
Once your female lays her ootheca, your role shifts from matchmaker to guardian. The primary risks now come from tiny invaders and environmental factors, not from the parents themselves. In the wild, ants, spiders, and parasitic wasps seek out egg cases, and indoors, mites or mold can pose a silent threat.
To safeguard the ootheca, we must mimic natural protections. I always move the egg case to a separate, clean incubation container-a simple plastic deli cup with ventilation holes works perfectly. This prevents the female from accidentally damaging it and lets you control the conditions. Here is a simple preventative routine:
- Isolate gently: Carefully cut the ootheca from its anchor point using a blunt knife, trying to keep its structure intact.
- Clean container: Use a container with a moistened paper towel or a bit of slightly damp sphagnum moss at the bottom to maintain humidity.
- Monitor for mold: Check weekly for any fuzzy white or green patches. A tiny dab of diluted antifungal vinegar on a cotton swab can treat small spots.
Place the incubation container in a warm, quiet spot away from direct sunlight. The goal is to create a still, humid microclimate that whispers of a safe, hidden leaf in the undergrowth, where the eggs can develop undisturbed. For species like my Giant Asian mantis Moss, whose oothecae are robust and foam-like, this isolation method has always resulted in successful hatches.
When Breeding Doesn’t Go as Planned
It happens to every keeper: a seemingly perfect pairing yields no ootheca, or the eggs never hatch. First, please know that this is a normal part of learning the rhythms of mantis care, not a reflection on your dedication. The most common scenario is an infertile mating, where the female lays an egg case that contains no developing nymphs. For breeders dealing with ootheca not hatching, a quick troubleshooting checklist can help pinpoint issues. This guide covers the key factors to review to improve hatch rates.
An infertile ootheca often appears perfectly normal but may feel lighter or more brittle over time. If weeks pass beyond the expected incubation period with no hatch, you can gently dissect a small portion to check for empty chambers-a sobering but educational moment. Other plans that go awry include the female consuming the male before or after mating, or nymphs hching but failing to thrive.
- If the male is lost: This is natural behavior for many species. Ensure the female is well-fed beforehand to reduce the risk, but do not blame yourself if it occurs.
- If nymphs are weak: This often points to incubation humidity being off. Record your conditions and adjust for the next attempt, aiming for that gentle, consistent moisture.
- Take a breath and reset: Clean the enclosures thoroughly, give your mantises a rest, and consider trying again with a different pair if possible.
We learn as much from the quiet disappointments as we do from the bustling hatcheries. Each attempt deepens your feel for the delicate balance these creatures need, guiding your hands to become more attentive and your setup more forgiving. Keep notes, stay patient, and trust that your care is creating a safer space for these remarkable insects.
Common Mantis Queries
What is a mantis breeding guide?
A mantis breeding guide is a specialized resource that details the methods and best practices for reproducing mantis species in a home setting. It serves to educate keepers on the full lifecycle, from courtship to nymph care, ensuring higher success rates. Part of this is learning how to set up a perfect breeding enclosure for mantises. A well-designed habitat provides secure containment, proper ventilation, and the right humidity to support courtship, mating, and egg case development.
How long is the gestation period for mantises?
For mantises, the gestation period is the incubation time for eggs, which typically spans 3 to 8 weeks depending on species and environmental conditions. Maintaining stable warmth and humidity is crucial for this development phase.
How many nymphs hatch from an egg case?
The hatch count from an ootheca varies by species, often ranging from 30 to 100 nymphs for common pet mantises like the Ghost or African species. Proper incubation and post-hatch care are essential to support these delicate newcomers.
Nurturing the Next Generation
Successful mantis breeding blossoms from a serene, species-appropriate enclosure and a gentle, observant approach to pairing your insects. Your patience and attention to detail-from the mating ritual right through to caring for the delicate ootheca-are what truly allow a new generation to flourish.
As a keeper, embracing responsible ownership ensures every life in your care, from adult to nymph, is treated with respect and kindness. We encourage you to keep learning, sharing notes with other enthusiasts, and letting each season with your mantises teach you something new.
Further Reading & Sources
- Breeding mantids | Jenny Read
- Breeding praying mantises | Keeping Insects
- How to Breed Praying Mantis – Time to Breed
- r/mantids on Reddit: Breeding praying mantis tips.
Rowan Hale is a lifelong insect enthusiast who fell in love with mantises for their calm presence, alien elegance, and surprising personalities. After years of keeping and raising a variety of species, Rowan shares practical tips, creative insights, and real-world experience to help others enjoy the quiet magic of mantis care. From setting up the perfect enclosure to understanding their subtle behaviors, Rowan invites readers into a gentle, curious world where every tiny movement feels like a discovery.
Breeding Practices