Ootheca Not Hatching? A Troubleshooting Checklist for Breeders
Greetings, mantis friend. Watching an ootheca can feel like tending a silent, secret garden-full of hope, yet sometimes met with quiet disappointment when those tiny nymphs don’t appear.
In most cases, an ootheca fails to hatch due to simple environmental tweaks you can easily make, like adjusting humidity or temperature.
Hatching these delicate egg cases is a nuanced process, influenced by subtle factors that even experienced keepers might overlook.
Here’s a quick look at what we’ll explore together:
- How to check and correct humidity and temperature levels
- Signs of viable versus non-viable oothecae
- Common handling mistakes and how to avoid them
Common Reasons Your Ootheca Isn’t Hatching
When an ootheca fails to hatch, it often stems from a few key areas we can easily address. Pinpointing the root cause helps you adjust your care routine and boost future success rates. Here are 9 common ootheca care mistakes that can prevent successful hatching and how to avoid them. Recognizing these missteps helps you fine-tune your routine to improve hatch rates.
- Humidity imbalance: Too little moisture can dry out the eggs, while excessive dampness may encourage mold or suffocate developing nymphs.
- Temperature issues: Mantis eggs need consistent warmth; if it’s too cold, development stalls, and extreme heat can be fatal.
- Poor ventilation: Stagnant air traps humidity and allows mold to spread, creating an unhealthy environment for hatching.
- Mold growth: Visible fuzzy patches or a musty smell indicate fungal issues that can invade and destroy the ootheca.
- Parasites: Tiny pests like mites might infest the casing, feeding on the eggs and preventing them from maturing.
- Incorrect timing: Some species take weeks or months to hatch; rushing or misjudging the schedule leads to unnecessary worry.
How to Check Ootheca Viability and Health
Assessing your ootheca’s condition requires a gentle touch and careful observation. We’ll walk through simple methods to determine if those tiny mantis lives are thriving or if it’s time to troubleshoot. This is part of our care guide for praying mantis egg cases (ootheca), covering setup and hatch care. It highlights what a healthy ootheca looks like and how to troubleshoot common issues.
Step 1: Visual Inspection for Mold and Damage
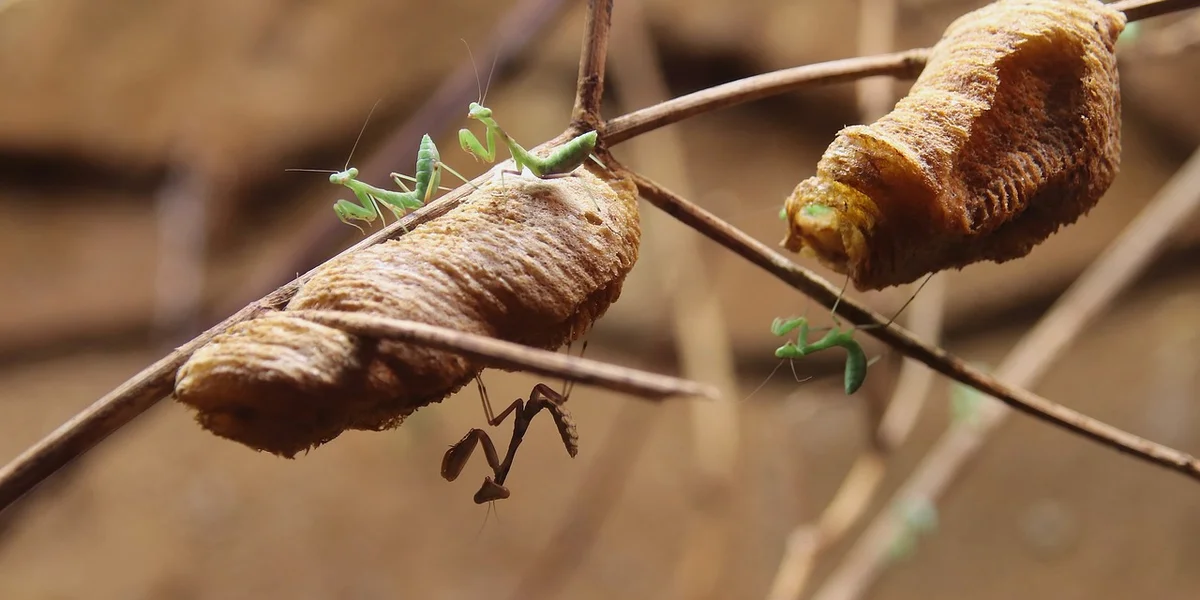
Begin by examining the ootheca under good light without touching it directly. A healthy ootheca typically has a uniform, light brown color and a firm, papery texture, much like the ones my Ghost Mantis Luna produces. Look for any discoloration, soft spots, or webbing that could signal mold or pest activity. If you spot fuzzy grey or green patches, it’s a clear sign of compromise. Handle it minimally to avoid stressing any potential nymphs inside.
Step 2: Candling to Gauge Development
Hold the ootheca up to a soft, bright light source, like a phone flashlight, in a dim room. This technique, similar to checking an egg, lets you see shadows or movement that hint at nymph development. Gently rotate it to view different angles; viable ootheca may show tiny, dark shapes shifting inside, while empty ones appear hollow. Always use a cool light and avoid prolonged exposure to prevent overheating the delicate eggs. From my time with Moss, my Giant Asian Mantis, I’ve found candling most effective a few weeks before expected hatching.
Environmental Factors for Successful Hatch Rates
Getting the environment just right feels a bit like tending a miniature greenhouse-every detail matters for those tiny mantis nymphs to emerge. Balancing humidity, temperature, and ventilation is key to preventing common issues like mold or dried-out ootheca. We’ve found that different species thrive under slightly varied conditions, so let’s compare what works best for a few popular types. Temperature and humidity do the trick.
| Mantis Species | Ideal Humidity Range | Optimal Temperature Range | Ventilation Needs |
|---|---|---|---|
| Ghost Mantis (e.g., Luna) | 60-80% | 22-28°C | Moderate; avoid stagnant air |
| Giant Asian Mantis (e.g., Moss) | 50-70% | 24-30°C | Good airflow to reduce moisture buildup |
| Orchid Mantis (e.g., Sprig) | 60-80% | 25-30°C | High; mesh lids work well |
Notice how each species has its sweet spot-too much humidity invites mold, whilst too little can desiccate the eggs. We always aim for that gentle balance, much like the damp morning air in a forest clearing.
Humidity and Moisture Control
Humidity wraps the ootheca in a protective, misty hug, but it’s easy to overdo it. Light misting once or twice daily with lukewarm water keeps things humid without drenching the enclosure. For substrate, we lean toward sphagnum moss or coconut fiber-they hold moisture well and feel soft underfoot. Avoid letting condensation cloud the walls; that’s a sign to boost ventilation. With our Ghost Mantis Luna, we mist lightly in the mornings, and her ootheca stays plump and healthy without any mold worries.
Temperature and Incubation Settings
Steady warmth coaxes nymphs out, mimicking the gradual shift of seasons in the wild. Using a low-wattage heat mat placed near the enclosure provides consistent, gentle heat without sudden spikes. We’ve had success with Moss’s ootheca by keeping temperatures stable around 26°C, much like a sunny spring day. If you’re aiming to trigger a hatch, try a slight drop at night to simulate natural cues-just a degree or two can make all the difference. Remember, patience is your ally here; rushing with high heat can do more harm than good.
Step-by-Step Troubleshooting for Stalled Ootheca
When an ootheca seems stuck, don’t fret—a methodical approach often reveals the fix. If your mantis lays an ootheca unexpectedly, stay calm and apply the same steps. This calm, methodical approach helps protect the eggs and ensures you handle the situation safely. Follow this checklist to gently nudge things along, step by step, whilst keeping your mantis babies safe.
- Step 1: Evaluate current humidity and temperature with tools like a digital hygrometer and thermometer to spot any imbalances.
- Step 2: Adjust environment gradually and monitor changes over a few days, such as increasing misting or tweaking heat sources slightly.
- Step 3: Address mold or pests with safe cleaning methods, like wiping surfaces with a dilute vinegar solution and replacing affected substrate.
- Step 4: Recheck timing and species-specific hatch windows, as some ootheca need weeks or months based on the mantis type and conditions.
Handling Mold, Parasites, and Common Threats
Keeping your mantis ootheca safe means watching for hidden dangers like mold, tiny parasites, or curious predators. Regular checks and a clean environment can prevent most issues before they harm the precious eggs inside. We always start by ensuring good airflow and stable humidity to create a healthy space. A clean, well-maintained habitat makes inspections easier and reduces risks to the ootheca. If problems arise, gentle cleaning and quick action often save the ootheca, but sometimes isolation or careful disposal is the kindest choice.
Preventing and Treating Mold
Mold loves damp, still air, so we keep humidity around 60-70% for most species and avoid over-misting. A small fan or extra ventilation holes in the enclosure can stop fuzzy white patches from forming on the ootheca. If you spot mold, use a soft brush or cotton swab dipped in lukewarm water to wipe it away gently. Reduce misting for a day or two to let the area dry. With Luna’s ootheca, we once found a faint gray film and cleared it with a light dab-no harsh chemicals needed.
For stubborn cases, move the ootheca to a drier spot temporarily and check daily. Consistent humidity control is your best defense against mold coming back. We use a hygrometer to monitor levels and adjust as seasons change. Remember, a slightly dry ootheca is safer than a soaked one.
Identifying and Managing Parasites
Parasites like mites or tiny flies can sneak into enclosures and target ootheca. Look for small holes, webbing, or sluggish movement near the eggs as early warning signs. Isolate any affected ootheca immediately to protect others. We’ve had success with eco-friendly methods, such as introducing predatory mites that eat harmful ones without chemicals. A soft vacuum with a fine nozzle can remove visible pests gently.
Prevention starts with quarantining new plants or decor before adding them. Natural solutions like neem oil sprays, diluted and applied sparingly, help deter parasites without risking the mantis eggs. If an ootheca shows heavy infestation, it’s often safer to discard it to prevent spread. Moss’s enclosure once had a mite issue, and quick isolation saved the rest of the batch.
After Hatch Care for Healthy Nymph Emergence
Once nymphs emerge, their tiny bodies need immediate attention to thrive. Focus on these priorities right after hatching to give them the best start. In the first 30 days of your mantis nymph complete survival guide, daily checks, proper enclosure, and steady feeding are essential. This sets the stage for healthy growth and higher survival rates.
- Separate nymphs gently to prevent cannibalism.
- Offer food within 24 hours to support energy.
- Set up a secure, small enclosure to reduce stress.
- Monitor for active behavior and regular feeding.
Setting Up the First Enclosure
Choose a small container like a mason jar or deli cup with mesh lids for plenty of air flow. Add fine twigs or mesh sides so nymphs can climb easily and feel secure. We line the bottom with paper towel for simple cleaning and avoid any sharp objects. Keep the space minimal-just a perch or two and a shallow water dish if needed. For Sprig’s first home, we used a clear cup with a twig, and she settled in without fuss.
Position the enclosure in a warm, quiet spot away from direct sun. Good ventilation prevents mold and helps nymphs breathe comfortably in their new space. Check that lids fit snugly to stop escapes, but ensure tiny gaps don’t trap delicate legs.
Feeding and Monitoring New Nymphs
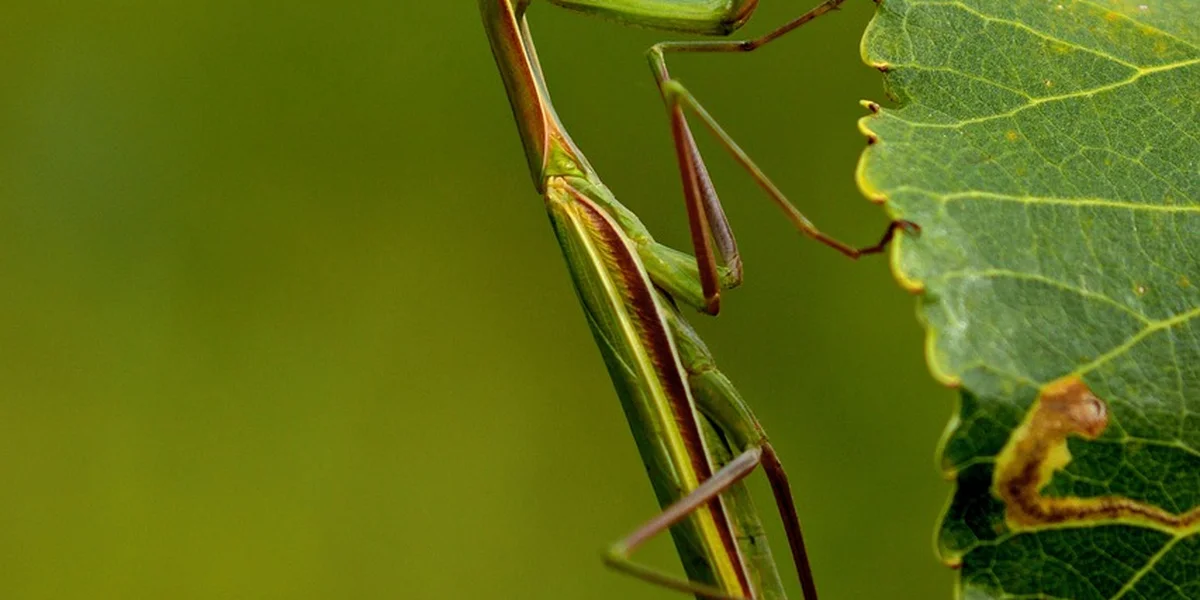
Start with pinhead crickets or flightless fruit flies—prey no bigger than the nymph’s head. Feed them every day or two, watching to see if they catch and eat eagerly. We often use a small paintbrush to guide prey toward the nymphs if they’re shy. Signs of thriving include active hunting, smooth molting, and steady growth. If a nymph hides constantly or refuses food, it might need quieter surroundings or a diet change. Learn more about what baby praying mantis nymphs eat.
Keep an eye on hydration by misting the enclosure lightly each morning. Healthy nymphs will drink droplets and move with purpose, while stressed ones may stay still or curl up. We note any unusual colors or behaviors early to adjust care quickly. With Moss’s brood, we learned that consistent feeding times reduced competition and kept all nymphs growing strong.
Common Mantis Queries
How long should I wait before considering an ootheca non-viable?
Wait at least the full expected incubation period for your mantis species, which can range from weeks to several months. The exact timing depends on species and conditions, which is why many ask how long it takes for mantis egg hatching time. In general, hatchings occur within a window of weeks to a few months. If no hatching occurs and the ootheca shows no signs of life, such as darkening or movement, it may be time to reassess its viability.
Is it normal for some oothecae to not hatch at all?
Yes, it’s common for a small percentage of oothecae to be infertile or fail due to genetic factors or minor environmental shifts. Breeders often expect some losses as part of the natural reproductive process in captive mantis populations.
What are the first steps if I find dead nymphs inside the ootheca?
Gently remove and dispose of the ootheca to prevent mold or bacteria from spreading to other enclosures. Clean the area thoroughly and review your humidity and temperature settings to prevent similar issues in the future.
Guiding Your Mantis Ootheca to Success
We’ve walked through checking temperature, humidity, and incubation setup to give your mantis eggs the best chance. Always observe your ootheca closely for changes and adjust conditions gently to mimic their natural habitat.
Responsible mantis keeping means staying curious and learning from each breeding attempt. We encourage you to keep a simple journal of your experiences, as every mantis teaches us something new about their delicate world. In line with an ethical guide for line breeding and selective breeding mantises, prioritize welfare and genetic diversity in your projects. By documenting outcomes and considering the impact on future generations, you practice responsible breeding that respects each insect’s wellbeing.
Further Reading & Sources
- Ootheca not hatching | Mantid Forum – Mantis Pet & Breeding Forum
- Praying Mantis ootheca still hasn’t hatched?! | Arachnoboards
- Everything you need to know about an ootheca – Insektenliebe
- ARBICO Organics: It’s Ootheca Time!
Rowan Hale is a lifelong insect enthusiast who fell in love with mantises for their calm presence, alien elegance, and surprising personalities. After years of keeping and raising a variety of species, Rowan shares practical tips, creative insights, and real-world experience to help others enjoy the quiet magic of mantis care. From setting up the perfect enclosure to understanding their subtle behaviors, Rowan invites readers into a gentle, curious world where every tiny movement feels like a discovery.
Egg Care