How to Breed Mantis Species Successfully: A Step-by-Step Guide
Published on: December 5, 2025 | Last Updated: December 5, 2025
Written By: Rowan Hale
Hello fellow mantis friend,
Picture a misty morning in your terrarium, where a female mantis, like my gentle Ghost Luna, tilts her head with quiet focus before depositing a frothy ootheca that will soon cradle new life.
Breeding mantis species successfully comes down to replicating nature’s rhythm in your care-through thoughtful pairing, controlled environments, and attentive post-mating support.
This process weaves together biology and keeper intuition, but with a clear roadmap, you can nurture the next generation with confidence.
Our guide breaks it into manageable steps, starting with these core takeaways:
- Selecting vibrant, well-fed adults as your breeding pair
- Timing introductions to match natural mating readiness
- Creating a calm, spacious setup to reduce stress during encounters
- Monitoring ootheca development and preparing for nymph care
Understanding Mantis Breeding and Getting Started
Breeding your pet mantises is more than a project; it’s a quiet journey into the heart of their life cycle. You get to witness the delicate dance of courtship, the careful laying of oothecae, and the thrilling emergence of dozens of tiny nymphs. Many keepers maintain a praying mantis breeders journal, tracing each pairing and the 60-day ootheca cycle. These notes help plan care and anticipate hatch times for future broods. It transforms your care from daily routine into a gentle act of stewardship, helping sustain captive populations and deepening your connection to these fascinating insects.
We find keepers are drawn to breeding for many heartfelt reasons. It starts with simple curiosity about how these creatures live and multiply. For others, it’s a personal contribution to conservation, especially for species that face habitat loss. There’s also the pure, quiet joy of observing growth and behavior most never see. Each reason shares a common thread: a desire to understand and nurture life in its most intricate forms.
If you’re new to this, choosing a calm, adaptable species makes all the difference. Here are a few we’ve found to be wonderfully straightforward for beginners:
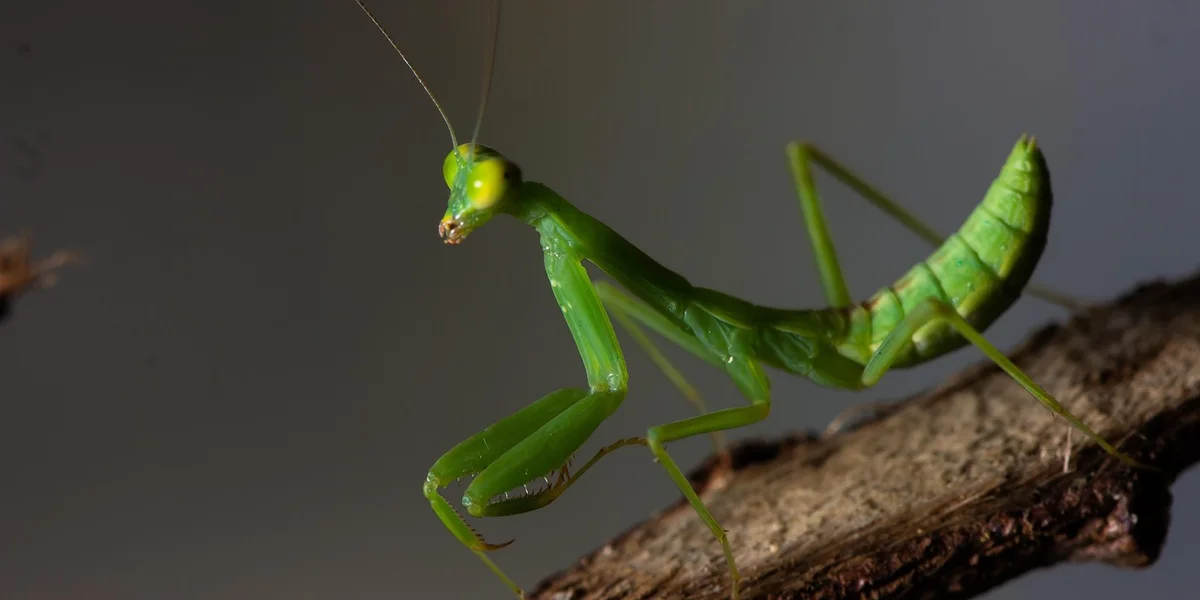
- Ghost Mantis (Phyllocrania paradoxa): With their leaf-like frills and peaceful demeanor, they’re less prone to cannibalism. Our Luna, a ghost mantis, moves with such deliberate slowness that introductions are often stress-free.
- Giant Asian Mantis (Hierodula membranacea): Hardy and vibrant, they adapt well to various conditions. Moss, our male, showed such energetic curiosity that he made the breeding process feel lively yet manageable.
- European Mantis (Mantis religiosa): A classic choice, they’re readily available and have clear, observable breeding behaviors that teach you the basics.
- African Mantis (Sphodromantis lineola): Another robust species, known for tolerance and consistent appetite, which helps keep energy levels up during breeding.
Preparing the Perfect Breeding Environment
Setting Up the Breeding Enclosure
Think of the breeding enclosure as a peaceful studio where nature takes the lead. It’s not just a cage; it’s a safe, naturalistic space that mimics the gentle nooks they’d seek in the wild. A well-planned habitat reduces stress, encourages natural behavior, and sets the stage for successful mating. Consider a bioactive enclosure for your praying mantis. It uses live plants and beneficial microfauna to mimic a natural habitat. Let’s walk through the setup, step by step.
- Select the Right Size: Choose an enclosure that’s at least three times the length of your mantises in height and width. A tall, spacious terrarium or a large mesh cage gives them room to court and retreat.
- Add a Safe Substrate: Line the bottom with a shallow layer of coconut fibre or peat moss. This holds moisture for humidity and provides a soft landing spot.
- Provide Climbing Enrichment: Use sterilised twigs, bamboo poles, or artificial plants. Create a network of perches at different levels. We often use bendable vines to shape little pathways our mantises love to explore.
- Ensure Secure Ventilation: Fit the enclosure with fine mesh panels on at least two sides. Good airflow prevents mould and keeps the air fresh, whilst keeping tiny nymphs safely inside later on.
Remember, clutter is your friend here. A few extra leaves or a piece of cork bark can offer hiding spots that make both mantises feel secure. Observing our own mantises, we’ve noticed they’re much more likely to engage in breeding rituals when their space feels like a miniature forest floor, rich with texture and quiet corners. For a breeding setup, translate this into a dedicated enclosure that mimics a forest floor. Maintain stable humidity and temperature, with plenty of texture and concealment to encourage mating.
Dialing in Climate and Habitat Conditions
Climate is the silent conductor of the breeding process. Getting temperature and humidity just right signals to your mantises that it’s the ideal season for reproduction. Stable conditions mimic the reliable patterns of spring and summer, triggering their natural instincts without any rush or confusion.
Here’s a simple guide to the ranges for the beginner species we mentioned:
| Species | Temperature Range (°C) | Humidity Range (%) |
|---|---|---|
| Ghost Mantis | 22-28 | 60-70 |
| Giant Asian Mantis | 24-30 | 50-60 |
| European Mantis | 20-26 | 40-50 |
| African Mantis | 25-32 | 50-60 |
Use a reliable digital thermometer and hygrometer to monitor these levels daily. A small heat mat on one side of the enclosure can create a gentle gradient, letting your mantises choose their comfort zone. We’ve found that a consistent warm spot, around 26°C, often becomes a favourite perch for pre-mating basking.
Lighting plays a subtle but key role. Provide a regular day-night cycle of about 12 hours of light and 12 hours of darkness. Indirect natural light or a low-wattage LED bulb works well. Avoid bright, harsh lights that can cause stress. This rhythmic lighting, combined with stable warmth and humidity, tells your mantises that conditions are safe and abundant for starting a family. Mist the enclosure lightly each morning with warm water to maintain humidity, watching the droplets cling to leaves like morning dew. That humid, earthy scent you create is a signal they instinctively understand.
The Courtship and Mating Process
Identifying Partners and Timing
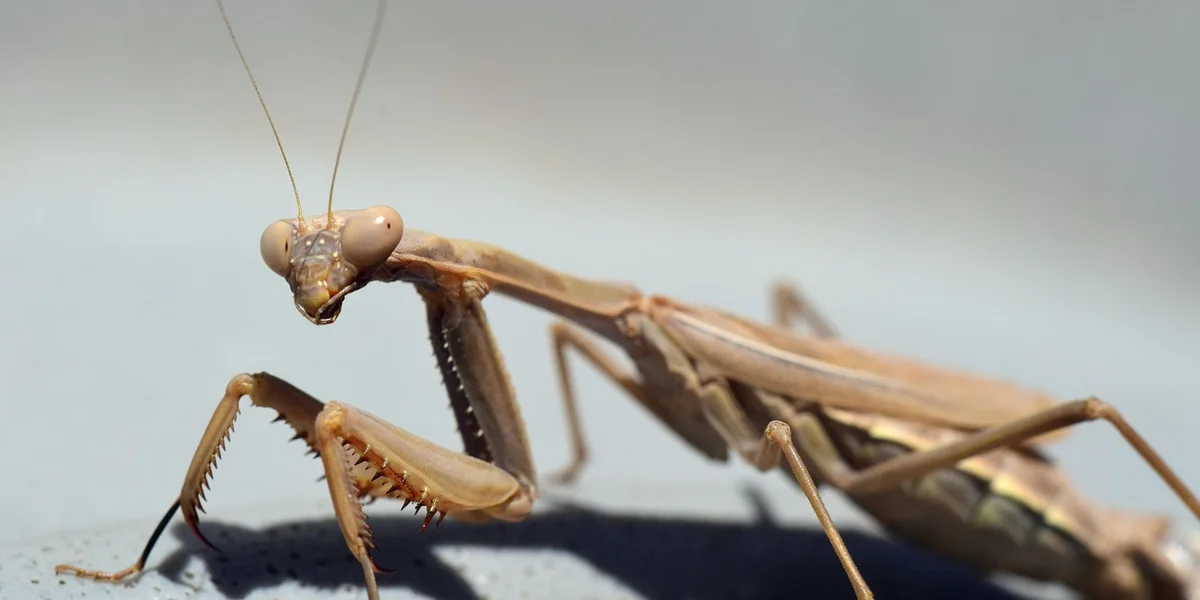
Before introducing mantises, we need to confirm their sexes-a task simpler than it sounds with a keen eye. Look for the subtle differences: females often boast a stouter, rounder abdomen built for egg-laying, while males tend to be slimmer with noticeably longer antennae that help them detect pheromones. For instance, my Giant Asian Mantis, Moss, had antennae almost as long as his body, whereas Luna, my Ghost Mantis, carried a fuller, leaf-like abdomen even before maturity.
- Body Size: Adult females are generally larger and heavier; think of a female’s build as more robust compared to the male’s lightweight frame.
- Abdomen Shape: Gently observe from above-a female’s abdomen is wider and segments are more pronounced, especially as she nears breeding condition.
- Antennae Length: Males sport longer, often bushier antennae; these delicate sensors are key for finding a mate across short distances.
In captivity, mantises don’t follow strict seasonal clocks, but they respond to gentle cues. Simulating a soft seasonal shift with slightly warmer temperatures around 75-80°F and consistent, bright daylight hours can encourage natural mating behaviors. A gradual increase in misting to raise humidity mimics spring rains, signaling it’s time for courtship. Different mantis species require different temperature and humidity ranges, so adjust conditions to fit the species you keep. Look up the specific climate needs for your mantis to avoid under- or over-stressing it.
Feeding and Safety Protocols
Nutrition lays the foundation for successful breeding, both before and after mating. Focus on quality feeds like gut-loaded fruit flies or small crickets dusted with calcium, which boost the female’s health for ootheca formation and give males energy for their cautious approach. I always offer my mantises these nutrient-rich meals for at least a week prior, watching them become more active and alert.
- Pre-Mating: Increase feeding frequency to every other day with gut-loaded insects, ensuring both partners are vigorous and well-hydrated.
- Post-Mating: For the female, maintain a steady diet-she’ll need extra resources to produce and lay her egg case, so offer food daily if she accepts it.
Introducing mates requires patience to reduce the risk of cannibalism, a natural but manageable behavior. Follow these steps to create a safer encounter, drawn from quiet evenings supervising my own mantises in a softly lit room.
- Pre-feed the female generously a few hours before introduction, so she’s less likely to view the male as prey.
- Place both mantises in a neutral, spacious enclosure free of distractions, like a large terrarium with ample climbing sticks.
- Monitor closely without sudden movements; if the female shows aggression, use a soft brush to gently separate them and try again later.
- Allow mating to proceed naturally, which can take minutes to hours, and be ready to intervene only if the male is attacked.
- Once mating concludes, carefully return each mantis to their own habitat, giving the female extra peace and quiet.
Based on personal keeper experiences, gentle precautions make all the difference. Always have a clean container on hand for swift separation, and avoid handling the mantises directly during this process to minimize stress. With my Orchid Mantis, Sprig, I found that dimming the lights slightly helped keep her calm, making the introduction feel more like a slow dance than a confrontation.
From Mating to Egg Laying: The Ootheca
Once mating is complete, your female mantis will soon turn her energy to crafting her ootheca-the remarkable, self-contained egg case that cradles her future nymphs. To understand the ootheca, picture a tiny, organic fortress, spun from a protein-rich foam she secretes that hardens in air to a protective, cork-like shell. Freshly laid, it feels warm and slightly yielding, with a frothy, bubbled texture that smells faintly earthy, like damp moss after a rain. Its shape is a masterclass in camouflage: some resemble curved almond pods, others look like neat, ridged loaves, all designed to blend seamlessly onto a branch or leaf stem. My ghost mantis, Luna, formed one that was a perfect replica of a withered oak leaf, all muted browns and delicate frills, tucked quietly in a corner of her tank.
The journey from mating to laying follows a natural, observable sequence. You will notice her abdomen becoming rounder and more pronounced over the following days, a sure sign her body is preparing the eggs. She will often seek a secure, elevated spot-a firm twig or the enclosure ceiling-and begin releasing the liquid foam, kneading it with her abdomen to envelope each egg. This process is methodical and can take several hours, during which she remains focused and still, save for the gentle pulsing of her body as she works.
The Gestation Timeline: A Simple Flow
- The First Week: Post-mating, she may eat voraciously to fuel egg development. Her abdomen starts to swell.
- Week Two to Three: She becomes more deliberate in her movements, scouting for the perfect laying site. Appetite often decreases.
- The Laying Day: In one continuous session, she extrudes the foam, molds the ootheca around her eggs, and securely attaches it. The case hardens to a protective finish within hours.
The number of oothecae a female produces is a direct reflection of her species and her wellbeing. A robust, well-nourished mantis can gift you with several egg cases over her lifetime, each spaced a few weeks apart. Hardy species like the European Mantis might lay four to eight, while more specialised ones like the delicate Orchid Mantis often manage just two or three. My own experience with Sprig, my juvenile orchid, reminds me that a stress-free environment and steady meals are the bedrock for successful ootheca production. Each case is a testament to her health and your care, holding the quiet potential for dozens of tiny new lives.
Incubating Eggs and Caring for Hatchlings
Incubation and Hatching
Once your mantis lays her ootheca, the real quiet work begins. Successful incubation hinges on mimicking the gentle, consistent conditions of a warm spring morning. We’ll walk you through a keeper-tested method to give those eggs their best start.
Find a small, well-ventilated container-a clean deli cup with a mesh lid works perfectly. Gently secure the ootheca to a twig or the container’s side using a dab of non-toxic glue; never bury it. Place this nursery in a spot away from direct sun, drafts, and any curious pets or pests like ants. A high shelf in a quiet room is ideal.
- Maintain a steady temperature between 75°F and 85°F (24°C to 29°C). A simple heat mat placed near one side of the container can create a gentle gradient.
- Keep humidity around 60-70%. Lightly mist the air inside the container every two or three days, avoiding spraying the ootheca directly to prevent mould.
- Check daily for signs of dryness or condensation, adjusting your misting routine as needed. The ootheca should feel firm, not soggy or brittle.
Hatching is a silent marvel. After several weeks, you might notice tiny pinpricks along the ootheca casing. Nymphs emerge in a coordinated cascade, often at dawn, each dangling on a silken safety line. They resemble minuscule, pale adults and will remain still for hours while their exoskeletons harden. Be prepared for many; a single ootheca can release over a hundred nymphs. For those following an ootheca watch, this marks the 6-week countdown hatching day—mark it on your checklist. A precise hatching day helps you plan to observe the first coordinated emergence.
Rearing Mantis Nymphs
Those first delicate days are crucial. Your main goals are simple: offer safety, food, and moisture. Set up a nursery enclosure for the hatchlings using a larger ventilated container lined with paper towel and furnished with fine twigs or mesh for climbing. This gives them space to disperse and reduces early cannibalism.
Their first meals must be tiny. Introduce flightless fruit flies or micro crickets as soon as the nymphs begin to move actively. Many keepers compare fruit flies vs houseflies to decide what works best for each nymph stage. For the smallest instars, fruit flies are usually easiest, while houseflies offer larger meals as the nymphs grow. A light dusting of the enclosure with these feeders twice a day ensures everyone finds a meal. Maintain gentle humidity with a very fine mist every other day, just enough to see a faint dew on the sides.
Watch for signs of thriving nymphs. Healthy ones are alert, with bright eyes and a quick strike when prey wanders close. You’ll see them groom their forearms meticulously after eating, a sure sign of comfort. Stress shows as lethargy, refusal to eat, or a darkening of colour. My Ghost Mantis, Luna, taught me that a content nymph will perch with a relaxed, almost thoughtful posture, whilst Moss’s offspring would get skittish and clump together if the air felt too dry.
For the adults, especially the female, ensure she has ample food and water after laying. She may seem weary; offer her favourite feeder insects and a gentle misting to drink from. Observing her return to a normal hunting routine is a good indicator she’s recovering well from the reproductive effort.
Troubleshooting and Ethical Considerations
Even with perfect preparation, breeding mantises is a delicate dance with nature. Having a plan for when things don’t go as expected is just as vital as setting up the perfect introduction. We’ll walk through common hurdles and the thoughtful steps that come after success.
Solving Common Breeding Problems
When you check on an ootheca day after day, hoping for signs of life, silence can feel worrying. Many of these challenges have straightforward, keeper-friendly solutions. The first rule is observation; often, the issue reveals itself if you watch the enclosure’s daily rhythms.
A primary concern is an ootheca that never hatches. This usually points to infertility, often due to a mismatched mating where the female wasn’t quite ready. An infertile ootheca will often appear shriveled, discolored, or oddly lightweight compared to the plump, sturdy look of a fertile one. If you suspect infertility, gently remove it to keep the enclosure clean. For breeders dealing with ootheca not hatching troubleshooting checklist, a quick troubleshooting checklist can help pinpoint causes and guide corrective steps. A basic checklist can cover mating timing, incubation conditions, and careful handling to avoid damage.
Mold is another frequent visitor, especially in very humid setups. A tiny spot can often be dabbed away with a cotton swab dipped in a diluted vinegar solution, but widespread fuzz means the eggs are likely compromised. Improving ventilation is your best defence, creating a gentle air flow that discourages damp stagnation without drying everything out.
For the nymphs that do emerge, their first days are the most fragile. A sudden die-off often traces back to two issues: food size or humidity. Nymphs need prey so small it’s almost invisible to us, like springtails or freshly hatched fruit flies, or they will simply starve. Equally, a failed first molt is almost always a humidity problem; their skin dries and sticks. A light, fine mist on the enclosure walls each morning provides the moisture spike they need to slip free safely.
Briefly, be mindful of tiny predators. Mites or small ants can invade an enclosure, attacking vulnerable eggs or newborn nymphs. Safeguard your breeding setup by keeping it elevated, ensuring no overripe feeder insects are left inside, and periodically checking the enclosure’s corners and ventilation mesh for unwanted guests.
Managing Outcomes Thoughtfully
Success in breeding brings its own beautiful responsibility. Before you even attempt a pairing, ask yourself the most important question: what will I do with 50, 100, or even 200 tiny mantises? Ethical breeding is defined by this forward planning.
Overpopulation is the greatest risk, leading to stress, cannibalism, and an overwhelming burden on you, the keeper. We must breed with intention, not for sheer numbers, and always prioritise the wellbeing of each individual insect we’ve brought into the world. It’s a quiet pact we make with these remarkable creatures.
Plan for nymph homes well in advance. Set up multiple small, simple enclosures-clean deli cups with mesh lids work wonderfully. Having these “nursery stations” ready before hatching prevents last-minute scrambles that jeopardise the nymphs’ safety. For my own Ghost Mantis, Luna’s offspring, I had two dozen tiny homes prepared, each with a twig and a damp cotton ball tip, weeks before her ootheca hatched.
If you find yourself with more nymphs than you can care for, seek responsible rehoming paths. Connect with local reptile or invertebrate pet shops, or reach out to online mantis-keeping communities where experienced enthusiasts are often seeking specific species. This is part of handling unwanted mantis nymphs responsibly. Rehoming through reputable channels helps ensure they receive proper care. Never release captive-bred mantises into the wild, as they may not be native and can disrupt local ecosystems.
For the nymphs you keep, commit to their full lifecycle. Each one deserves attentive care, appropriate space, and a peaceful life, from its first cautious strike at a fruit fly to its final, graceful molt into adulthood. This mindful management is the true hallmark of a dedicated and respectful mantis keeper.
Common Mantis Queries

What are common predators or pests that threaten mantis eggs or nymphs?
Common threats include small ants, mites, and even mold within the enclosure. Safeguard your breeding setup by keeping it elevated, ensuring proper ventilation, and never leaving deceased feeder insects inside.
How do you discard or manage excess mantis offspring?
Responsible management involves planning for rehoming through local pet shops or online invertebrate communities before breeding begins. You should never release captive-bred mantises into the wild, as they may disrupt local ecosystems.
Are there any ethical considerations in mantis breeding?
The primary ethical consideration is committing to the lifelong care of all offspring you cannot rehome. Breeding should be undertaken with clear intent and preparation, never for sheer numbers, to prioritize the wellbeing of each individual.
Your Mantis Breeding Journey Awaits
Successful breeding flows from perfecting your mantis’s home, introducing mates with calm precision, and safeguarding the precious ootheca afterward. By moving at your mantis’s pace and observing their subtle cues, you create the quiet confidence needed for new life to begin.
We honour these creatures by committing to ethical practices, ensuring every hatchling has a dedicated home. Let your care evolve with each generation, finding joy in the shared wisdom of our gentle keeper community.
Further Reading & Sources
- Breeding mantids | Jenny Read
- Breeding praying mantises | Keeping Insects
- How to Breed Praying Mantis – Time to Breed
- r/mantids on Reddit: Breeding praying mantis tips.
Rowan Hale is a lifelong insect enthusiast who fell in love with mantises for their calm presence, alien elegance, and surprising personalities. After years of keeping and raising a variety of species, Rowan shares practical tips, creative insights, and real-world experience to help others enjoy the quiet magic of mantis care. From setting up the perfect enclosure to understanding their subtle behaviors, Rowan invites readers into a gentle, curious world where every tiny movement feels like a discovery.
Breeding Practices