How to Breed Mantis Species Successfully: A Step-by-Step Guide
Published on: December 5, 2025 | Last Updated: December 5, 2025
Written By: Rowan Hale
Hello, fellow mantis friend,
Picture this: a male mantis, all delicate angles and cautious steps, approaching a female perched like a living emerald statue. That moment of quiet tension holds the entire secret to mantis breeding-a blend of art, science, and a keeper’s gentle patience.
To breed mantis species successfully, you’ll need to master their environmental cues, introduce mates with precise timing, and provide unwavering care from ootheca to nymph.
While the process has its nuances-what works for a bold Giant Asian won’t suit a shy Orchid mantis-the core principles are wonderfully accessible. We’ll break it down into clear, manageable steps, so you can navigate each stage with confidence.
Here’s what you’ll learn in this guide:
- How to read your mantis’s readiness for breeding, from subtle body language to molting cues.
- Setting up a safe, stress-free enclosure that encourages natural mating behaviors.
- The careful ritual of introducing mates to prevent aggression and ensure success.
- Proper ootheca incubation, handling, and creating the perfect hatchling habitat.
- Essential early care for fragile nymphs, including their first meals and habitat needs.
Understanding the Basics of Mantis Breeding
Breeding mantises is a quiet art, a process of observation and gentle support rather than direct intervention. It involves creating stable, species-specific conditions that encourage natural behaviours, from courtship dances to the careful laying of a precious egg case, called an ootheca. We’re not forcing anything, simply setting the stage for nature to take its course under our watchful care. So, does the praying mantis mating process work? When conditions support natural courtship—stable temperatures, appropriate photoperiod, and minimal stress—the mating sequence can unfold as in the wild, often followed by the laying of a healthy ootheca.
What Does Breeding Pet Mantises Involve?
Think of it as a three-act play: preparation, introduction, and incubation. Your role is that of a stage manager. You’ll ensure both mantises are healthy and well-fed, design a safe space for their meeting, and later, provide the perfect environment for the female to lay her eggs and for those eggs to develop. Success hinges on your ability to read their body language-knowing the difference between a curious tilt and a defensive strike pose is your most important skill.
It requires patience. The entire process, from pairing to hatching, can span several weeks or even months, depending on the species. You’ll be monitoring humidity, temperature, and the well-being of your female long after the male has played his part.
Choosing Your First Breeders: Beginner-Friendly Species
For your first venture, choose species known for their calm temperaments and straightforward care needs. These species typically have clear visual cues and are less prone to cannibalism when introduced properly.
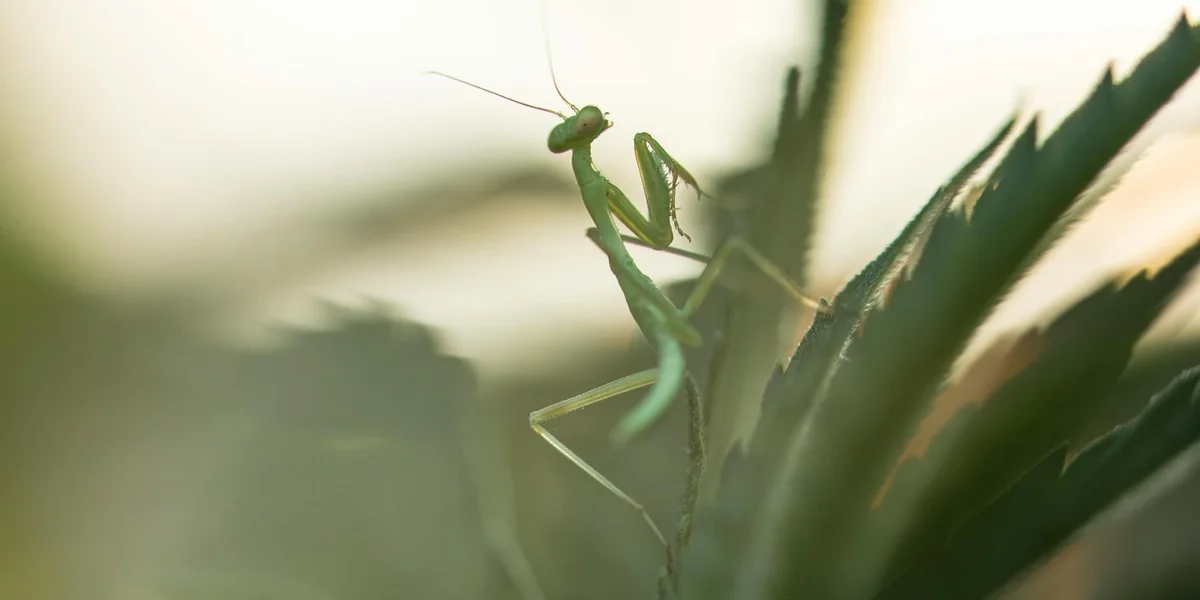
- Giant Asian Mantis (Hierodula membranacea): Robust, adaptable, and prolific. Our Moss, a male of this species, was a calm and willing participant. Females produce large, hardy oothecae that are forgiving of minor humidity fluctuations.
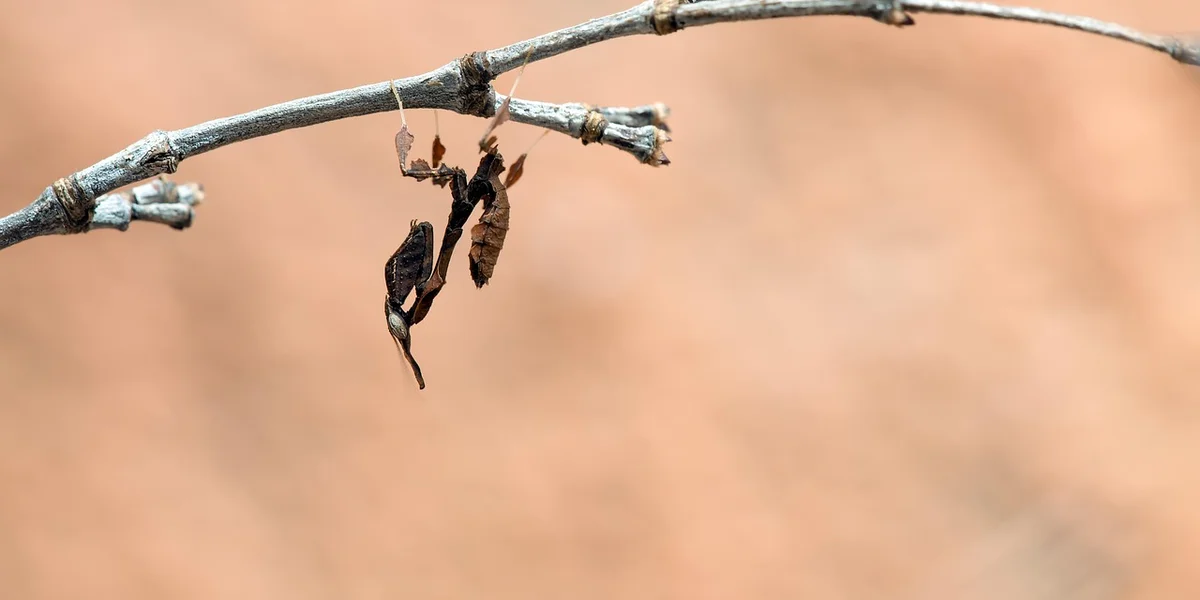
- Ghost Mantis (Phyllocrania paradoxa): Small, delicate, and less cannibalistic than many. Their slow, leaf-like movements make introductions less frantic. Our female Luna moved through her breeding with a thoughtful, almost leisurely grace.
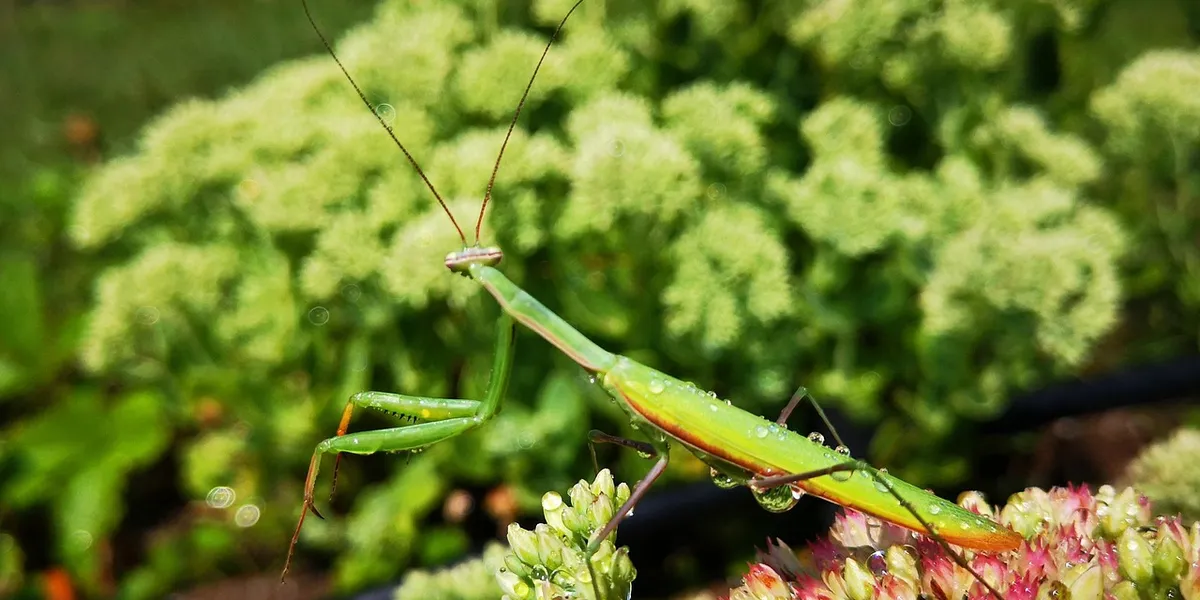
- African Mantis (Sphodromantis lineola): Another excellent, hardy choice. They are bold feeders and their breeding behaviours are very observable, giving you clear signals throughout the process.
Avoid highly specialised or notoriously delicate species like orchids for your first attempt; master the fundamentals with a forgiving mantis first.
The Mantis Life Cycle: A Quick Overview
Knowing this cycle helps you anticipate needs. It’s a simple but miraculous transformation.
- Egg (Ootheca): The female deposits a foamy egg case that hardens into a protective shell. Inside, dozens of embryos develop.
- Nymph: Wingless miniatures of the adults hatch. They will molt, or shed their exoskeleton, 6 to 9 times to grow. Each stage is called an instar.
- Subadult: The final molt before adulthood. You can often see wing buds developing.
- Adult: The final, winged form. This is the breeding stage. Adults, particularly males, often have a much shorter lifespan.
The entire goal of breeding is to safely guide a mated female to the point of ootheca laying, and then to steward that ootheca until the tiny nymphs emerge, ready for their first molt.
Creating the Ideal Breeding Habitat
The enclosure is your foundation. For breeding, we think about space, security, and microclimates. A stressed mantis will not breed, so their home must be a haven. To set up the perfect breeding enclosure for mantises, tailor the space for stability and privacy with a secure lid. A calm, well-ventilated microclimate will maximize breeding success.
Selecting the Right Enclosure Size and Type
For the breeding introduction itself, a larger, neutral enclosure is often best. A standard 12x12x12 inch mesh or glass terrarium works well for most medium-sized species.
- Height is Key: Mantises need vertical space to molt and perform courtship displays. Ensure the enclosure is at least three times the length of the mantis in height.
- Secure Ventilation: Fine mesh lids are ideal. They prevent escapes of tiny nymphs later while providing crucial airflow to stop stagnant, mold-friendly air.
- Interior Design: Provide plenty of anchor points. Twigs, bendable vines, and mesh sides give the male avenues to approach and, crucially, escape after mating. A broad-leafed plant at the top gives the female a preferred laying site.
We often use a dedicated ‘breeding terrarium’ that is lightly furnished to minimise hiding spots where aggression could go unseen, making the process safer and easier to monitor.
Perfecting Temperature and Humidity Levels
These parameters signal the seasons to your mantises. A slight, natural drop in temperature at night can stimulate breeding behaviour in some species.
- Temperature: Most beginner species thrive at 72-82°F (22-28°C) during the day. A small heat mat on one side of the enclosure, controlled by a thermostat, creates a gentle gradient. Avoid overhead heat lamps which can dry out the habitat.
- Humidity: This is critical for molting and for preventing the ootheca from desiccating. Use a digital hygrometer.
- Maintain 50-60% humidity for species like Giant Asians.
- Ghost Mantises prefer 60-70%.
Lightly mist the enclosure with warm water in the evenings, aiming for fine droplets on the leaves and sides-this mimics dew and encourages drinking without soaking the substrate. A shallow water dish is not recommended and can drown nymphs.
Lighting and Environmental Setup
Mantises do not require special UVB lighting, but they do need a consistent proper day-night cycle to regulate their internal clocks. To create a proper day-night cycle for your praying mantis, provide about 12 hours of light followed by 12 hours of darkness with a consistent schedule. A simple plug-in timer on a desk lamp makes this easy and helps regulate activity and feeding.
- Natural Light Cycle: Provide 12-14 hours of light using a simple, low-wattage LED or room ambient light. A timer is your best friend here, automating a sunrise and sunset.
- Placement: Keep the enclosure in a bright room but out of direct, hot sunlight which can cause fatal overheating.
- Calm Surroundings: Place the habitat in a low-traffic area. Vibration and constant movement can stress breeders. The ideal breeding environment feels like a quiet, humid corner of a greenhouse-warm, still, and full of life.
With this foundation set, your mantises have the security and signals they need to begin their natural rituals. The stage is set, and you are ready to observe one of the insect world’s most fascinating dramas.
Feeding for Fertility and Health
Your mantis’s path to successful breeding is paved with the meals you offer now. Consider their nutrition the quiet groundwork for vibrant eggs, energetic nymphs, and a harmonious mating dance. We learned this with Moss, our Giant Asian male; his most confident courtship followed a season of thoughtful, varied feeding. These insights align with a praying mantis feeding schedule species comparative guide. It compares how different species pace their meals so you can tailor feeding to each mantis’s needs.
Pre-Breeding Diet for Optimal Health
Begin refining your mantis’s menu about a month before introducing a partner. This focused feeding period builds vital reserves without causing unnecessary stress or obesity. Target live prey that has itself been fed well, a process we call gut-loading with fresh veggies like spinach or sweet potato.
- Feeding Schedule: Offer food to adult females every two to three days, and to males every three to four days. Females channel those extra nutrients directly into egg development.
- Ideal Prey: Select insects no larger than your mantis’s head. For our Orchid mantis, Sprig, that meant flightless fruit flies; for larger species, a fat cricket or roach nymph is perfect.
- Diet Rotation: Alternate between gut-loaded crickets, blue bottle flies, and the occasional moth. Variety mimics a natural diet and covers a broader spectrum of vitamins.
Look for a full, slightly rounded abdomen in your female-a gentle sign of progressing egg development. Overfeeding can lead to a lethargic mantis, so we aim for a balance where they remain keen hunters. Our Ghost mantis, Luna, becomes a still, brown statue if too full, so we watch her posture closely.
Hydration and Essential Supplements
Water is the unsung hero in your breeding preparations. Mantises absorb moisture from their environment, making consistent, gentle misting a core part of daily care. A fine spray bottle with aged or bottled water creates the dewdrops they naturally seek.
- Misting Routine: Lightly spray the enclosure foliage once or twice daily, preferably in the morning. Watch for your mantis to turn and drink-a slow, precise motion that signals contentment.
- Additional Hydration: In centrally heated homes, a small bottle cap with a moistened cotton ball offers a backup sip. Refresh it daily to keep it clean and inviting.
- Nutritional Boosts: A light dusting of calcium powder on prey once weekly aids the developing nymphs inside the eggs. We noticed Sprig’s pink and white marbling appeared more vivid after we started this practice.
Feel the humid air in the enclosure after misting; that earthy scent means conditions are right. Good hydration keeps their exoskeleton flexible, paving the way for a clean final molt before breeding. Moss’s emerald green seems to shine brighter when the humidity is just so, a sure sign of his well-being.
The Mating Introduction and Process
This is the moment many keepers approach with a mix of excitement and nervous anticipation. We’ve cared for our mantises individually, and now we gently orchestrate their meeting. A successful introduction hinges on preparation, patience, and reading the subtle language of mantis behavior.
How to Safely Introduce Male and Female Mantises
Never simply place the male into the female’s enclosure. That is her territory, and she will defend it. The goal is a neutral, spacious setting where both feel less pressured.
First, ensure the female is well-fed, offering a hearty meal 24 to 48 hours before the introduction. A hungry female is far more likely to view her suitor as food. We create a neutral introduction arena-a large, clean enclosure with plenty of vertical climbing space and multiple escape routes for the male. I often use a large, spare terrarium or a very clean, spacious plastic tub with mesh ventilation.
Place the female in this neutral space first and give her at least thirty minutes to settle and explore. Her initial roaming will help distribute her scent, making the environment less ‘neutral’ to her and more like a shared space.
Now, for the introduction itself. There are two gentle methods we prefer:
- The Distant Placement Method: Carefully place the male on a stick or mesh on the opposite side of the enclosure from the female, allowing him to spot her from a safe distance.
- The Paper Tube Approach: This is my go-to for skittish species. Let the male crawl onto a paper towel tube, then gently lower that tube into the arena near the female. He can observe her from the safety of his temporary cylinder before deciding to venture out.
Watch closely. The male will often freeze, then begin a slow, deliberate swaying motion. This is his focus. Do not intervene unless you see an immediate, aggressive lunge from the female.
Recognizing Courtship and Mating Behaviors
Mantis courtship is a quiet ballet of movement and stillness. The male’s initial sway is not just hesitation; it’s a form of communication, a way to gauge the female’s receptiveness and potentially blend his silhouette with surrounding leaves.
You might see him make slow, creeping advances, pausing often. A receptive female will often remain still or even make small, acknowledging movements. My male Moss would perform tiny, rhythmic dips of his abdomen when he sensed a female was calm.
The actual mating process can seem precarious, as the male leaps onto the female’s back and curls his abdomen to connect. They may remain coupled for hours, sometimes even a full day or more. During this time, they might move together slowly or stay perfectly motionless. It is vital you do not disturb them. No feeding, no misting, no tapping on the glass. Provide quiet and dim lighting.
A clear sign of success is when the female remains calm with the male mounted. If she tries to twist and reach for him, you may need to gently separate them with a soft brush and try again another day.
Managing Risks: Cannibalism and Stress Reduction
Let’s address the concern directly. Cannibalism can occur, but it is not an inevitable part of the process. It is often a result of stress, poor timing, or a defensive female.
Your primary tools for risk reduction are a well-fed female, a neutral introduction space, and your watchful presence. Always keep a soft artist’s paintbrush or a long piece of stemmed grass nearby-this is your gentle intervention tool to distract or separate mantises if needed.
If the female makes a sudden, aggressive turn towards the male, you can often deter her by lightly touching her antennae or front legs with the brush. This momentary distraction can give the male a chance to leap to safety.
After mating concludes, the male will usually dismount and quickly move away. This is the most critical moment. You must be ready to immediately and gently remove the male from the enclosure using your hands or a container. Do not leave them together afterward. Return each mantis to their own separate, quiet homes. The female will need extra food and peace as she begins developing her ootheca, while the male deserves a hearty meal and rest after his efforts. For a detailed guide on what to expect next, check out A Praying Mantis Breeder’s Journal: From Pairing to Ootheca in 60 Days.
Caring for Mantis Eggs and Oothecae
After the quiet drama of mating, your focus shifts to the delicate egg cases, or oothecae, your mantis will create. Treat each ootheca like a tiny, self-contained nursery that holds the promise of dozens of tiny mantises. They can look like frothy foam, hardened foam, or a sculpted pod, depending on the species. My Ghost Mantis, Luna, produces oothecae that resemble crumbled, dried marshmallow, stuck firmly to a branch. Caring for them is mostly about providing a stable, hands-off environment where nature can work its gentle magic.
You will want to leave the ootheca in the enclosure if possible, as moving it can risk damage. A secure ootheca means your female mantis has chosen a spot she deems safe, and we should respect that instinct. If you must move it for incubation, wait at least 48 hours for it to fully harden, then use a flat tool to gently pry it loose, supporting the entire structure. If your mantis lays ootheca unexpectedly in a different spot, leave it undisturbed and monitor its hardening. Only intervene if absolutely necessary, and follow the same careful handling once you decide to relocate.
Identifying Successful Mating and Egg Laying
Not every mating leads to fertile eggs, so watching for clear signs saves you from incubating an empty case. A successfully mated female will often become noticeably plumper in her abdomen over the following week or two. You might see her probing the enclosure walls, ceiling, or branches with the tip of her abdomen, testing sites for egg deposition.
The actual laying is a slow, meticulous process. She secretes a frothy liquid from her abdomen, shaping it with her body as it hardens around the eggs. When Moss, my Giant Asian male, mated, his partner later produced a vibrant green ootheca that smelled faintly of fresh earth and damp paper. A successful ootheca will be firm to the touch and securely attached. If she produces a very small, misshapen, or poorly attached case soon after mating, it might be a dummy ootheca or one with infertile eggs.
- Look for a distinct increase in the female’s abdominal size.
- Watch for repetitive probing behavior on surfaces.
- A healthy ootheca is fully formed, firm, and firmly stuck in place.
- Multiple oothecae are common from a single mating.
How to Incubate Mantis Eggs Properly
Incubation is simple but requires consistency. The goal is to mimic the gentle, humid warmth of a spring morning. We replicate the natural seasonal shift by keeping conditions stable, triggering the eggs’ internal clock. You do not need fancy equipment; a clean deli cup or small plastic terrarium works perfectly.
- Choose a Container: Select a well-ventilated container. I use clear plastic boxes with small air holes punched in the lid. This allows airflow without letting humidity escape too quickly.
- Set Up the Environment: Place the ootheca inside, ideally attaching it to the lid or a side wall with a dab of safe glue, mimicking its natural upward-facing position. Do not bury it or let it sit in moisture.
- Manage Humidity: Light misting on the container walls every two to three days is usually enough. You want to see a fine fog on the plastic, not pooling water. Too much moisture invites mould, which is the quickest way to lose an entire clutch.
- Control Temperature: Keep the container at room temperature, between 20°C and 25°C (68°F to 77°F). A warm spot, like the top of a fridge or a quiet shelf, often works. Avoid direct sunlight or drafts.
Check the ootheca weekly for any signs of mould or desiccation. If you see grey or green fuzzy spots, increase ventilation slightly and reduce misting. Patience is your greatest tool here; resist the urge to handle or shake the egg case.
Timeline: When Will the Eggs Hatch?
Hatching times vary widely, painting a calendar entirely dependent on species and warmth. Think of incubation as a slow, quiet countdown where temperature acts as the pacekeeper. Warmer conditions generally speed up development, while cooler ones delay it, much like seeds waiting for the right season.
For common pet species, here is a general guide:
- Chinese Mantis (Tenodera sinensis): Oothecae often hatch in 4 to 6 weeks at room temperature.
- Ghost Mantis (Phyllocrania paradoxa): Expect a longer wait of 6 to 10 weeks for those delicate, leaf-like nymphs.
- Giant Asian Mantis (Hierodula species): These can take 5 to 8 weeks. Moss’s offspring hatched like clockwork at 7 weeks in a consistently warm corner.
- Orchid Mantis (Hymenopus coronatus): Patience is key; their beautiful oothecae may need 8 to 12 weeks of incubation.
As hatching nears, the ootheca may darken slightly, and you might see tiny, shadowy shapes through the foam. The first sign of life is usually a dozen or more miniature mantis nymphs streaming out from a small slit, each no bigger than a grain of rice. Have a prepared nursery enclosure ready with fine mesh for climbing and fruit flies for their first meal. This moment, the quiet explosion of new life, is the gentle reward for your careful watch.
Raising Your Mantis Nymphs
Watching an ootheca hatch is a moment of pure magic-a tiny, bustling world emerges right before your eyes. Successfully shepherding these delicate nymphs into adulthood is where your role as a dedicated keeper truly blossoms. We’ll guide you through their earliest stages with a calm, attentive approach.
The First Days: Hatching and Initial Care
When the ootheca starts to split, you’ll see dozens of tiny, ant-like pre-nymphs wriggling free. They often hang from silken threads, a soft, shimmering curtain of new life. Your first task is providing immediate safety, as these newborns are exceptionally vulnerable to dehydration and each other. We recommend transferring them gently to a prepared nursery enclosure within the first 24 hours.
Set up a simple, well-ventilated container like a large plastic terrarium or a fine-mesh pop-up cage. Line the floor with paper towel for easy cleaning and include several fine twigs or soft plastic plants that reach to the top. Light misting on the enclosure walls, not directly on the nymphs, provides essential droplets for their first drink. A shallow bottle cap filled with damp cotton wool can also help maintain local humidity where they cluster.
- Separation is Key: House nymphs in smaller groups of 10-15 to minimize cannibalism and make monitoring easier.
- The First Meal: Do not offer food until after their first molt, which happens within a day or two of hatching. Their bodies are still hardening.
- Gentle Environment: Keep the nursery in a warm, quiet spot away from direct sunlight or drafts, mimicking the sheltered underleaf they instinctively seek.
Feeding and Caring for Young Nymphs
After that first molt, your nymphs will be hungry and active. Their diet must match their miniature size. Flightless fruit flies (Drosophila melanogaster) are the absolute cornerstone food for first and second instar nymphs of most species. You can culture these at home or purchase cultures from reptile suppliers. Sprinkle a few into the enclosure daily.
Observe feeding closely. A well-fed nymph will have a slightly rounded abdomen. Regular, light misting once a day maintains the humidity they need to molt successfully and prevents fatal dehydration. I recall my orchid mantis, Sprig, at this stage-her pale, petal-like body would press against the fine mesh after misting, sipping moisture with quiet focus.
- Food Progression: Start with fruit flies. For their third instar, introduce slightly larger prey like pinhead crickets or small house flies.
- Feeding Schedule: Offer a few appropriate-sized prey items every other day. Remove any uneaten live prey to avoid stress.
- Molting Space: Ensure plenty of climbing space and a ceiling from which they can hang upside-down, a non-negotiable requirement for a safe molt.
Preventing Common Health Issues in the Brood
Vigilance in the nursery prevents most setbacks. The primary threats are dehydration, mismolts, and fungal growth. Dehydration shows as a shriveled, darkened abdomen and lethargy; a timely, gentle misting can often revive a nymph if caught early. Mismolts, where the nymph gets trapped in its old skin, are usually due to low humidity or a lack of proper hanging space.
Maintain a clean environment to prevent health issues. Remove frass (droppings) and dead prey items promptly to deter mold and mites, which can overwhelm delicate nymphs. Paper towel substrates should be changed weekly, or immediately if damp or soiled.
| Issue | Signs to Watch For | Preventive Action |
|---|---|---|
| Dehydration | Lethargy, curled abdomen, inability to grip | Consistent light misting, provide water droplets on foliage |
| Mismolt | Nymph stuck in exuvia, distorted limbs | Boost humidity before expected molt, ensure ample hanging space |
| Fungal Growth | White fuzzy patches on substrate or decor | Increase ventilation, reduce over-misting, clean enclosure regularly |
| Cannibalism | Missing limbs or siblings, sudden population drop | House in smaller groups, ensure abundant food is available |
With a watchful eye and these gentle practices, your brood will grow stronger with each successive molt. Each instar passed is a quiet victory, bringing you closer to witnessing the incredible transformation into mature mantises.
Troubleshooting Common Breeding Issues
Even with careful preparation, breeding mantises can present quiet challenges that require a keeper’s gentle attention. Observing your mantises closely and adjusting your approach with patience often turns setbacks into valuable learning moments. We’ll walk through common hurdles, from silent mating dances that don’t culminate to precious oothecae that stay stubbornly still, always with an eye toward simple, effective solutions.
Dealing with Low Mating or Hatching Success
When introductions don’t lead to romance or eggs fail to hatch, it’s usually a whisper from the environment telling us something is off. The most common fix involves a thoughtful review of three key areas: temperature, humidity, and nutrition. Let’s break down where to look first.
Start by ensuring both your male and female are truly ready. A female mantis should be well-fed but not overly stuffed before mating, and males often need extra flight strength. I’ve found that offering my Giant Asian Mantis, Moss, extra fruit flies in the days before an introduction made him more confident and agile during his approach. To safely introduce male and female mantises for breeding, begin with a neutral enclosure and supervise the first meetings, ready to separate if signs of aggression appear. Keep introductions short at first and gradually extend as they tolerate each other.
If mates show interest but separate without connecting, consider these environmental tweaks:
- Gently raise the enclosure temperature by a few degrees using a low-wattage bulb, as warmth can encourage activity.
- Provide a light misting session beforehand to simulate a humid, dawn-like atmosphere.
- Ensure the mating space has ample vertical sticks and foliage for the male to approach safely from above.
For oothecae that don’t hatch, patience is your first tool—some species naturally take many weeks. Double-check that the egg case is kept at the species-specific humidity level, as desiccation is a silent enemy. A personal trick is to place a small, water-soaked sponge in a corner of the incubation container, which maintained perfect moisture for my Ghost Mantis Luna’s delicate ootheca. Proper care and attention to humidity can make all the difference.
Maintaining Sanitation and Preventing Disease
A clean enclosure is the unseen foundation of healthy mantis breeding, preventing mold and bacteria that can devastate fragile nymphs. Think of sanitation not as a chore, but as a daily ritual of care that keeps your tiny ecosystem in balance. The goal is to remove waste without causing stress to your inhabitants.
Establish a simple, weekly cleaning routine for adult enclosures and a more frequent one for nymph containers. Always use warm water and a soft cloth for wiping surfaces, avoiding harsh chemicals that leave dangerous residues. For a deep clean, a vinegar-water solution (one part vinegar to ten parts water) works wonders and is safe once fully evaporated.
Watch for these early signs of trouble and act quickly:
- Unusual lethargy or refusal of food.
- Discolored or runny frass (droppings).
- Fuzzy white or green mold spots on enclosure walls or decor.
Prevention is straightforward. Quarantine any new mantis or plant for at least two weeks in a separate container before introducing it to your breeding colony. This simple step saved my entire group when I once brought in a branch with unseen mites. That process is the first step in a standard, step-by-step quarantine protocol for new mantises. Using it as part of a formal protocol reduces the chance of introducing pests. Ensure good ventilation in all habitats to stop stagnant, moist air from settling.
Advanced Considerations for Continued Success
Once you’ve mastered the basics, a few refined practices can elevate your breeding from successful to consistently rewarding. Keeping detailed records transforms guesswork into informed strategy over multiple generations. Note dates of matings, ootheca layings, hatch rates, and any behavioral quirks.
Consider the genetic health of your line. If you’re breeding from the same group repeatedly, introduce new bloodlines occasionally to maintain vigor. Swapping a few nymphs with another responsible breeder can infuse your colony with beneficial diversity. This is especially helpful for color morphs in species like the Orchid Mantis; my juvenile Sprig’s lineage benefited greatly from such an exchange.
Advanced environmental control can make a significant difference. Some breeders use subtle temperature cycling, mimicking natural seasonal drops at night to stimulate breeding behavior. Experiment with very gradual changes, never sudden shocks, to see if your specific mantis species responds positively.
Finally, always tailor your approach to the species. What works for a hardy Giant African Mantis might stress a delicate Thistle Mantis. Join online forums or local groups to share notes with other keepers; their lived experiences are often the best guide for those nuanced, advanced tweaks. Your journey as a breeder is a living, growing process, much like the creatures you care for.
Questions from Fellow Mantis Friends
What are the best feeding practices during breeding?
Offer a varied, nutrient-rich diet of gut-loaded prey like crickets and flies to both mantises for several weeks before introduction. Ensure the female is well-fed 24-48 hours before pairing to reduce her hunting drive toward the male.
How do you pair male and female mantises for mating?
Always introduce the mantises in a neutral, spacious enclosure that is not the female’s home territory. Use gentle methods like the paper tube approach to allow the male to observe and approach safely, minimizing immediate aggression.
What are the risks of mating such as cannibalism and how can they be minimized?
Cannibalism risk is highest if the female is hungry or feels threatened. You can minimize it by feeding the female thoroughly before introduction and being ready to gently distract her with a soft brush if she shows aggression.
Stepping Back from the Nursery
Breeding mantises well means setting the stage with calm, thoughtful preparation and watching over the process with a gentle eye. From ensuring your pair is well-fed and content in a secure space to recognizing the quiet signs of readiness, your attentive presence makes all the difference for a smooth mating and healthy ootheca.
Caring for these creatures is a continuous practice in responsibility and wonder. We encourage you to keep asking questions, stay connected to the keeping community, and let each new life cycle deepen your appreciation for the quiet art of mantis guardianship.
Further Reading & Sources
- Breeding mantids | Jenny Read
- Breeding praying mantises | Keeping Insects
- How to Breed Praying Mantis – Time to Breed
- r/mantids on Reddit: Breeding praying mantis tips.
Rowan Hale is a lifelong insect enthusiast who fell in love with mantises for their calm presence, alien elegance, and surprising personalities. After years of keeping and raising a variety of species, Rowan shares practical tips, creative insights, and real-world experience to help others enjoy the quiet magic of mantis care. From setting up the perfect enclosure to understanding their subtle behaviors, Rowan invites readers into a gentle, curious world where every tiny movement feels like a discovery.
Breeding Practices