How to Breed Mantis Species Successfully: A Step-by-Step Guide
Published on: December 5, 2025 | Last Updated: December 5, 2025
Written By: Rowan Hale
Hello fellow mantis friend,
There’s a gentle thrill in witnessing the cautious first meeting of a mantis pair, a silent exchange that holds the promise of new life in your care.
Breeding mantis species successfully is a rewarding journey built on careful observation, species-specific preparation, and a calm, patient approach to each stage of their lifecycle.
It’s a process with its own subtle challenges, from ensuring compatible mates to safeguarding delicate nymphs, but we’re here to walk you through it all.
This guide will help you focus on a few vital areas:
- Selecting healthy, mature individuals and introducing them safely.
- Creating the ideal enclosure conditions for breeding and egg-laying.
- Managing the mating process to keep both mantises secure.
- Rearing the next generation with the right food and habitat from day one.
What Is Mantis Breeding and Why Start This Journey?
Mantis breeding is the careful process of guiding your pet mantises through their natural reproduction cycle, from a successful mating to the fascinating emergence of tiny nymphs. It begins with introducing a mature male and female, proceeds through the female creating a protective egg case called an ootheca, and culminates in the thrilling hatch where dozens of miniature mantises enter the world, as documented in my breeder’s journal.
The rewards of this journey are deeply personal and wonderfully educational. Breeding allows you to sustain a population of your favourite species, reducing the need to purchase from the wild and giving you a front-row seat to one of nature’s most intricate life cycles. There’s a quiet magic in learning the subtle signs of readiness and providing the exact conditions life needs to unfold.
Beyond practical benefits, the pure joy of witnessing hatchlings is unforgettable. Watching those first, tentative movements of nymphs, each a perfect replica of their parents, fills you with a profound sense of connection and wonder. I remember the evening my Ghost mantis, Luna, began forming her first ootheca; she worked with such slow, deliberate purpose, a soft rustling in the stillness, crafting a tiny, frothy cradle against a twig. That moment of patient creation is why many of us start this journey.
Choosing the Right Mantis Species for Breeding Success
Common and Beginner-Friendly Pet Mantis Species
Starting with a species known for cooperative breeding behaviour makes your first attempt much smoother and far more rewarding. These three species are celebrated for their relative ease and manageable care, making them excellent candidates for a novice breeder’s project.
- Ghost Mantis (Phyllocrania paradoxa): With their leaf-like frills and calm temperament, Ghost mantises are remarkably placid. Breeding is generally straightforward, as females are less prone to cannibalism with proper feeding, and they produce manageable oothecae. Their care needs are simple, thriving in warm, humid terrariums that mimic a forest floor.
- Giant Asian Mantis (Hierodula membranacea): This species is robust, hardy, and shows clear signs of maturity. They breed readily, and the females lay large, impressive oothecae. While the males, like my Moss, are energetic fliers, their overall care is undemanding, needing a spacious enclosure and a steady diet of feeder insects.
- Orchid Mantis (Hymenopus coronatus): For those drawn to breathtaking beauty, Orchid mantises offer a unique challenge. Their breeding requires precise humidity and temperature, but success yields nymphs of stunning pink and white. They can be shy, like my juvenile Sprig, but their specific needs teach meticulous husbandry.
Key Factors in Selecting Your Breeding Pair
Choosing your mantises is more than just picking a species; it’s about selecting two healthy individuals that will give their offspring the best start. Always source your breeding pair from reputable keepers to ensure you know their age and lineage, which is vital for genetic health. For hobbyist breeders, understanding mantis genetics provides a practical primer for planning pairings and tracking lineages. A basic grasp of inheritance helps predict trait expression and maintain healthy, diverse populations.
Consider the adult size and lifespan of the species, as this dictates the timing for mating. You’ll want to introduce the male to the female shortly after her final molt, when she is receptive and less likely to see him as prey. Ensure you have all the care resources ready for the potential nymphs, including plentiful food like fruit flies and multiple small enclosures.
Above all, select individuals that are active, have intact limbs, and show no signs of illness. Using unrelated mantises strengthens the genetic diversity of your hatchlings, leading to a hardier and more vibrant generation. It’s a simple step that echoes good stewardship, giving your tiny charges every advantage.
Understanding the Mantis Life Cycle: From Egg to Adult
Before we introduce potential mates, it helps to know the remarkable journey your mantis will take. Their life cycle is a masterclass in transformation, and each stage requires slightly different care from us.
The Ootheca: A Tiny, Foamy Fortress
It all begins with the egg case, or ootheca. This isn’t just a cluster of eggs; it’s a sophisticated, protective structure the female creates from a frothy liquid she secretes. It hardens into a lightweight, papery or Styrofoam-like case, perfectly camouflaged against bark or stems. Inside this fortress, dozens-sometimes hundreds-of eggs are insulated from predators and harsh weather, safely waiting for the right conditions to hatch.
The Nymph Stages: A Series of Shed Skins
When the tiny nymphs, called L1 instars, emerge, they look like minuscule, wingless versions of their parents. Their childhood is defined by a series of molts, or instars. Before each molt, they’ll stop eating and hang motionless, often upside-down, for a day or two.
This is a vulnerable time, so we ensure their habitat has plenty of grip and humidity to help them wriggle free from their old skin. With each successful shed, they grow larger, develop more detail in their raptorial arms, and after several molts, tiny wing buds begin to appear. My Ghost Mantis, Luna, was a misty brown after her fourth molt, her leaflike frills becoming more pronounced with every shed.
Reaching Adulthood: Wings and Maturity
The final molt into adulthood is the most dramatic. A subadult mantis will molt one last time to reveal fully formed, functional wings (in winged species) and reach sexual maturity. This is the phase where differences between males and females become most obvious-males are often slender with longer antennae and larger wings relative to their body, while females tend to be stockier.
Sexual maturity typically occurs about two to four weeks after that final molt, which is your window for breeding attempts. My Giant Asian male, Moss, became incredibly active and curious once his vibrant green wings fully hardened, constantly testing them with soft flutters.
A General Timeline for Common Pet Species
While timing varies with temperature and food supply, here’s a rough guide from my own notes:
- Ghost Mantis (like Luna): Nymph stage spans 5-7 molts over 3-5 months. Adults can live for another 6-9 months.
- Giant Asian Mantis (like Moss): Progresses through 7-8 instars over 4-6 months. Adult males may live 3-4 months post-maturity, while females often live 5-8 months.
- Orchid Mantis (like Sprig): A slightly slower grower, taking 5-7 months through 6-7 molts to reach adulthood. Their stunning adult coloration deepens with each molt.
Patience is your greatest tool during this cycle, as rushing or disturbing a mantis, especially pre-molt, can lead to fatal complications. Watching Sprig’s soft pink marbling intensify with each shed was a quiet reward for providing consistent, calm care.
Creating the Ideal Breeding Habitat and Environment
Think of this space as a quiet, green-lined nursery where every detail whispers safety and readiness. We’re crafting a sanctuary that feels like a soft, humid morning in the mantis’s native home, putting both insects at ease for the delicate dance ahead. My ghost mantis, Luna, always seemed more inquisitive and calm in her properly arranged breeding tank, her frilled arms relaxed instead of held tight.
Setting Up Your Breeding Enclosure or Terrarium
A breeding enclosure isn’t just a container; it’s a stage for a critical natural ritual. Your primary goal is to provide enough room for cautious interaction while eliminating any cramped stress that could lead to aggression. For a pair, a vertical terrarium about 30 centimetres tall and 20 wide works beautifully for most common species like the Giant Asian.
Ventilation is a silent guardian against stale air and mould. We use a fine mesh lid or side panels to ensure a gentle cross-breeze, mimicking the open air they’d experience whilst perched on a leaf. This keeps the environment fresh without creating harsh drafts that can dehydrate your mantises.
Underfoot, choose a substrate that holds moisture without risk. Coconut coir or sterilised peat moss are our top picks, as they’re digestibly safe if accidentally ingested and help maintain a steady humidity from below. Avoid small bark chips or gravel that could harm delicate feet or curious mouths.
Climbing decor transforms a bare tank into a familiar landscape. Offer an assortment of clean twigs, artificial vines, and broad-leafed silk plants to create multiple perches and visual barriers. This allows the female to retreat and the male to approach carefully, which we’ve seen with our Moss, who uses every branch as a scout point.
Here’s a straightforward checklist you can assemble with items from around the home:
- A large, clear jar or acrylic terrarium (clean and dry).
- Window screen or mesh fabric secured with clips for a DIY lid.
- A layer of chemical-free potting soil or coconut fibre.
- Several washed branches from non-toxic trees like oak or maple.
- A few plastic or silk leaves for extra cover and egg-laying sites.
Optimizing Temperature, Humidity, and Light for Mating
These elements work in concert to signal that the season is right for breeding. Gently warming the environment to around 26-29°C (79-84°F) sparks natural activity and metabolic readiness in both mantises. You can achieve this by placing the enclosure in a consistently warm room or using a small, low-wattage heat mat on one side.
Humidity is the quiet cue for egg-laying. Aim for a slight boost from your mantis’s normal range, targeting about 60-70% for many tropical species, to simulate the moist conditions after a rain. To set up the perfect humidity level in your praying mantis enclosure, start with a controlled misting schedule and ensure adequate airflow. Use a hygrometer to dial in and maintain that range. We monitor this with a simple hygrometer, but you can often tell by the soft, dewy feel on the enclosure walls.
Photoperiod, or light cycling, guides their internal clocks. Providing about 14 hours of daylight and 10 hours of darkness mimics the long, active days of summer, encouraging hormonal changes that prime them for mating. A simple plug-in timer for a gentle LED or room lamp makes this adjustment effortless and consistent.
To adjust conditions without shock, we prefer gentle, keeper-friendly methods. Lightly misting the enclosure with warm water in the early evening creates a comforting spike in humidity and droplets for drinking, much like a natural dewfall. For heat, avoid direct lamps that can dry them out; instead, ambient warmth from a nearby radiator works a treat.
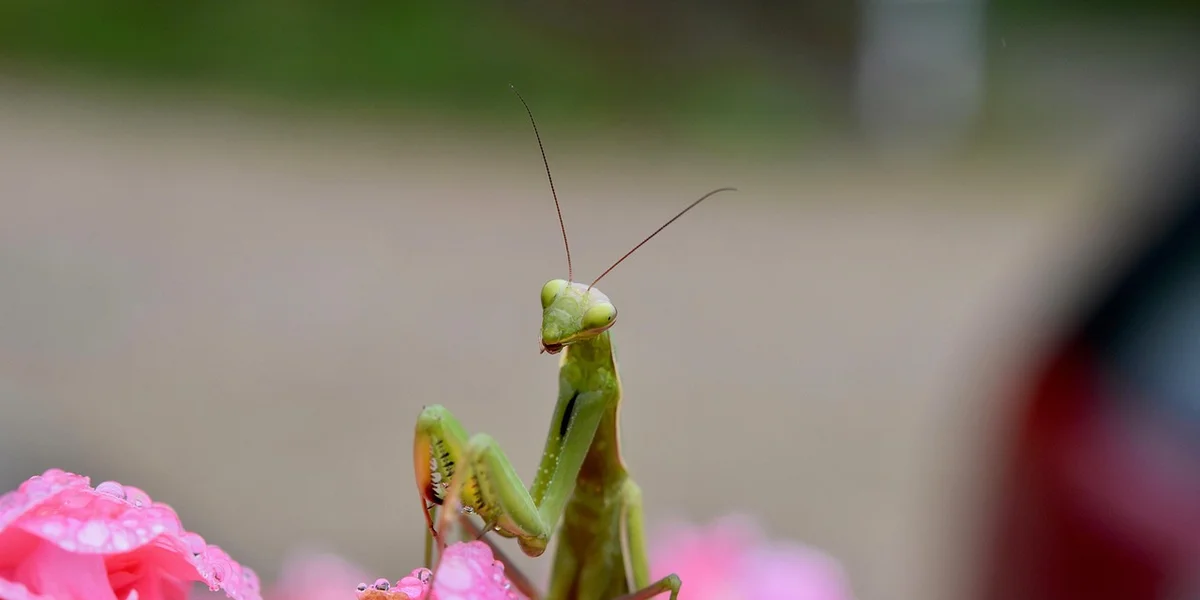
Remember, changes should be gradual over a few days. Observing your mantises is key-when our orchid mantis, Sprig, is content, she’ll perch openly and groom her petals, a sure sign the environment is just right.
Preparing Your Mantises for Successful Mating
Getting your mantises ready for their introduction is a quiet, watchful process. This careful preparation builds the foundation for a smooth, stress-free encounter for both insects. We’ll walk through two critical first steps: correctly identifying their sex and recognizing when they are truly ready for company. Curious whether the praying mantis mating process actually works in practice? We’ll discuss what success looks like and how proper timing and conditions can support a natural, successful pairing.
Accurately Sexing Your Praying Mantises
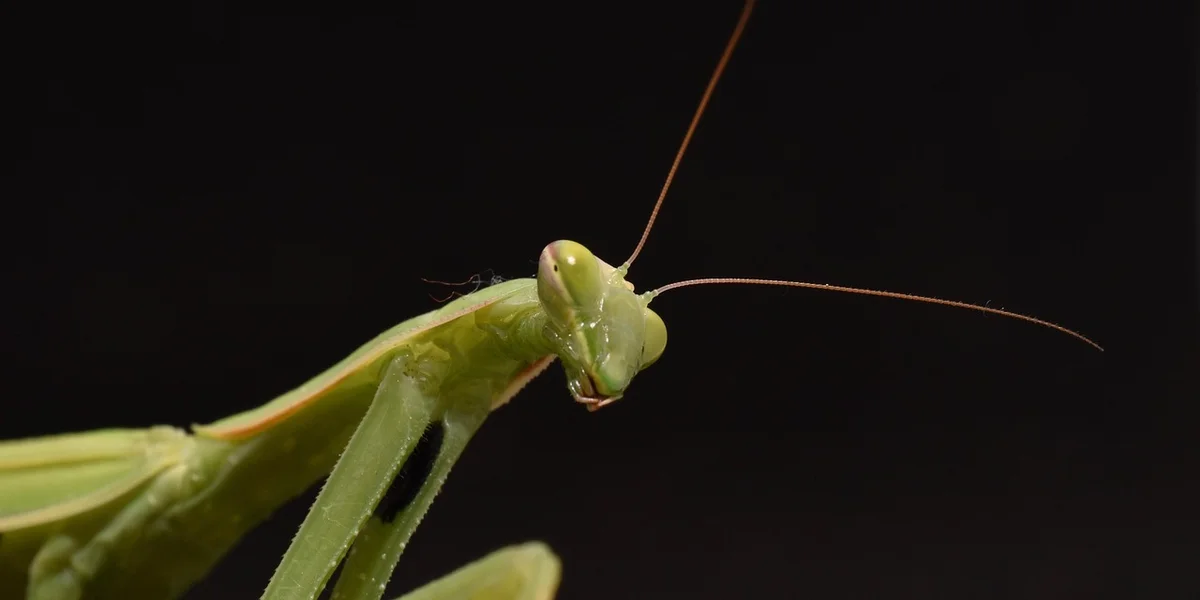
Before any introductions, you must be certain of who is who. Mistaking a large female for a male can lead to a very short, unfortunate meeting. Relying on size alone is the most common mistake, as some male mantis species can be surprisingly robust. Instead, we use a combination of reliable visual checks. In this complete guide, you’ll learn how to tell male from female mantises apart. We’ll cover clear visual cues you can use in the field.
- Count the Abdominal Segments: This is often the most reliable method for nymphs and adults. Gently coax your mantis onto a clear container or your hand and look at the underside of its abdomen tip. Females typically have six or seven distinct segments. Males usually have eight or more, and these segments often appear tighter and more uniform.
- Compare Wing Length and Body Shape: In winged adult species, males generally have longer wings that extend past the end of their abdomen, giving them a streamlined look for flight. Females often have shorter wings and a noticeably broader, heavier abdomen to accommodate eggs. Their overall silhouette is stockier.
- Observe Antennae and Overall Build: While not a standalone rule, males frequently have longer, more feathery antennae to detect female pheromones. They also tend to have a more slender, “leggy” build compared to the sturdy, powerful frame of a female.
Take your time with this. I often observe my Ghost mantis, Luna, over several days to be sure. A confident identification removes guesswork and allows you to plan with clarity and calm.
Identifying Signs of Mating Readiness in Females and Males
Once you know their sexes, the next step is patience. Introducing them too early can cause disinterest or aggression. We wait for clear, natural signals that each mantis is physiologically and behaviourally prepared. To safely introduce them for breeding, place them in a neutral, calm enclosure and monitor their interaction. If either shows aggression or stress, separate them promptly.
Look for these cues in females:
- A visibly plump, rounded abdomen that appears full and healthy, not just after a large meal.
- A generally calm, well-fed demeanor. A hungry female is far more likely to view a male as food.
- A receptive posture if a male is spotted nearby, which may involve staying still or slightly lowering her forearms rather than assuming an immediate strike pose.
Watch for these behaviours in males:
- Marked increase in activity, especially at dusk or dawn, with lots of climbing and exploring his enclosure.
- Subtle wing fluttering or vibrating, even when not attempting to fly, which is part of his readiness display.
- A cautious, deliberate approach when he detects a female, often with slow, rocking movements as he assesses the situation.
The single most important factor for both is impeccable health and proper feeding in the weeks leading up to introduction. Feed them well with nutritious prey like flies or small roaches. A well-fed female is less predatory, and a strong, agile male has the energy and reflexes needed for a safe approach. My male Giant Asian, Moss, becomes a whirlwind of cautious curiosity when he’s ready, but only after a steady diet has built his strength. This period of attentive preparation is your greatest tool for a successful pairing.
The Mating Process, Ootheca Formation, and Hatching
This stage is where careful planning meets the wonder of nature’s rhythms. It requires a watchful eye and a calm environment to succeed.
Step-by-Step Guide to Introducing Mates
We never simply place two mantises together. A supervised, neutral meeting space is vital for safety. We use a clean, spacious enclosure free of the male’s scent, placing a few branched twigs inside for the female to climb and feel secure.
Always introduce the male to the female’s location, never the other way around, to minimize territorial stress. Have a soft paintbrush and a spare container ready to gently separate them if needed. The best time is early evening, when mantises are naturally more active and alert. When handling, be gentle and brief, supporting its body and letting it climb onto your finger rather than grabbing it. Limit handling to reduce stress and potential injury.
Courtship Rituals and Mating Behaviors
Watch for a delicate dance. The male will often approach with slow, deliberate steps, rocking gently side-to-side. This movement likely helps him blend with foliage while assessing the female’s receptiveness.
His antennae will be in constant, flickering motion. If the female is ready, she will remain still, perhaps tilting her head. Mating can last from a few hours to over a day. The key sign of success is seeing the male transfer a small, pale spermatophore to the female; he may then quickly disengage and retreat.
My male Moss, an energetic Giant Asian, would perform this rocking dance with such focus, pausing for minutes at a time before making his final, cautious advance.
Post-Mating Care for the Female
Her work is just beginning. After mating, return the female to her own, quiet enclosure. Her body now needs extra resources to produce eggs.
Offer her more frequent, nutritious feeds. We provide larger or additional prey items every two to three days. Good hydration is also critical, so mist the enclosure lightly each evening. A well-fed female is more likely to produce a robust, viable ootheca, and is less likely to see the male as a future meal if reintroductions are needed.
What to Feed a Gravid Female:
- Gut-loaded crickets (fed nutritious greens)
- Blue bottle flies or houseflies
- Small moths
- Waxworms (as a occasional fatty treat)
Understanding and Incubating the Ootheca
The ootheca is the remarkable, foamy egg case she will create. She produces a liquid protein that she whips into a froth, laying her eggs into it before it hardens into a protective, often cork-like structure.
Females typically attach oothecae to sturdy twigs, mesh lids, or broad leaves. Do not attempt to move it, as this can damage the embryos inside. Each species’ ootheca is unique-some look like toasted marshmallows, others like tiny accordions made of wood.
Ideal Incubation Conditions:
| Factor | Ideal Condition | Notes |
|---|---|---|
| Temperature | 22-26°C (72-79°F) | A consistent, room-temperature range is perfect. |
| Humidity | Moderate (50-60% RH) | Mist the enclosure lightly, avoid directly soaking the ootheca. |
| Airflow | Gentle ventilation | Prevents mold while allowing gas exchange. |
| Position | Keep it upright | Mimics its natural attached position; never lay it flat. |
The Hatching Process and Caring for Nymphs
Patience is your greatest tool. Incubation can take three to eight weeks, depending on species and temperature. The first sign of hatching is often tiny, slit-like openings appearing along the ootheca’s keel (the ridged line).
Within hours, dozens of miniature, wingless versions of the adults-called nymphs or L1s-will pour forth, often dangling on thin silken threads. They are incredibly small and fragile, no bigger than a grain of rice for many species. My Ghost mantis Luna’s hatchlings looked like specks of moving dust with legs.
Timeline and Immediate Care:
- Pre-hatch: Prepare a separate, well-ventilated nursery enclosure with fine mesh or netting for the nymphs to climb.
- Emergence Day: Gently move the twig with the hatched ootheca into the nursery. Do not handle the nymphs directly.
- First Feed: Offer food (e.g., flightless fruit flies) 24-48 hours after their first molt, which usually happens within a day of hatching.
- Housing: Keep nymphs together initially but be prepared to separate them into smaller groups as they grow to prevent cannibalism.
Witnessing that first, bustling hatch is a quiet miracle-a culmination of your attentive care, now spinning into dozens of new, tiny lives.
Caring for Eggs and Raising Healthy Nymphs
Feeding Guidelines for Reproduction and Nymph Health
When you’re preparing mantises for breeding, think of their diet as the building blocks for the next generation. A well-fed adult produces more robust eggs, and those nutrients pass directly to the nymphs as they develop. For your breeding pair, offer slightly larger or more frequent meals in the weeks leading up to introduction.
We increase feeding to every other day for our females, like Moss, offering a hearty gut-loaded cricket or a plump blue bottle fly. Males can be fed a standard schedule, but ensure they are active and healthy.
- Prey Size: Offer prey that is no larger than the width between the mantis’s eyes for nymphs. For adults, prey can be up to the size of their thorax. A hatchling’s first meal might be a pinhead cricket or a flightless fruit fly.
- Frequency: Breeding females need feeding every 2-3 days. Nymphs, growing at an incredible rate, need daily access to appropriate-sized food. Watch their abdomens; a gently rounded shape means they’re well-fed.
- The Gut-Loading Imperative: This is non-negotiable for healthy offspring. Feed your feeder insects nutritious meals like fresh carrots, leafy greens, and commercial gut-load formulas 24-48 hours before offering them to your mantises. You are not just feeding an insect; you are creating a vitamin capsule for your mantis and her future young.
Managing Nymph Stages and Preventing Cannibalism
The moment the ootheca hatches, you’ll be met with a delicate cloud of tiny, moving legs. Your primary goals are keeping them fed, hydrated, and separate. Cannibalism is a natural instinct, not a sign of aggression, but we can manage it with careful setup.
We house our hatchlings in individual deli cups or in a large, well-planted communal enclosure with extreme caution. The separate container method is the safest for beginners.
- Housing Hatchlings: Use small containers like 2-ounce deli cups with a ventilated lid. A fine mesh or fabric hot-glued over a hole works perfectly. Line the bottom with a paper towel for easy cleaning. For a divided enclosure, use a large Kritter Keeper with fine mesh dividers, ensuring no gaps exist for tiny nymphs to slip through.
- Daily Nymph Care Routine:
- Morning Misting: Lightly mist one side of each enclosure with warm water. The droplets provide essential drinking water. Avoid soaking the nymphs directly.
- Feeding: Introduce an appropriate number of tiny prey items. For separate cups, one fruit fly per nymph is a good start. In a communal setup, you must provide a significant surplus of food to distract them from each other.
- Evening Check: Remove any uneaten prey to prevent stress, and do a quick visual check on each nymph’s condition and abdomen plumpness.
Stress is the main driver of cannibalism. A cramped, hungry, or dry nymph is far more likely to see its sibling as the next meal. Creating an environment of plenty is your strongest defense against losing nymphs to their siblings.
- Reducing Stress and Cannibalism:
- Always provide more space than you think they need. Overcrowding is the top cause of losses.
- Ensure a constant, obvious surplus of live food. When prey is actively moving everywhere, nymphs focus on hunting them, not each other.
- Include fine twigs or fake foliage that reaches to the top of the enclosure. This gives nymphs vertical space to spread out and feel secure.
- Keep handling to an absolute minimum. We only disturb them for essential maintenance or to move them to a larger home after a molt.
Watching a nymph like Sprig progress through each instar, growing more defined and confident with every shed, is a quiet joy. Your attentive care in these first fragile weeks sets the foundation for a strong, thriving generation.
Health, Ethics, and Troubleshooting Common Breeding Challenges
Addressing Health Concerns and Pests in Breeding
Keeping your breeding mantises healthy feels a bit like tending a delicate garden—it requires a watchful eye and a gentle hand. Small issues can quickly become problems in the close quarters of breeding setups, so regular checks are your best defence. Getting the habitat right from the start helps prevent problems. As you set up your first mantis habitat, avoid common mistakes like overcrowding, incorrect humidity, and poor ventilation. We will look at three common troubles and how to soothe them with minimal fuss.
Mites are tiny, spider-like pests that can hitch a ride on feeder insects or sneak in on new plants. You might spot them as minute, moving dots on the enclosure glass or, in worse cases, clustered around your mantis’s joints. I once found a few on Moss’s favourite climbing branch, which called for a calm, immediate clean. Gently relocate your mantis to a temporary jar, then wash the entire enclosure with warm water-avoid soaps or harsh chemicals. A soft artist’s brush can be used to carefully flick any mites from your mantis itself.
Fungal growth on an ootheca appears as fuzzy white or green patches and thrives in stagnant, overly damp air. Preventing this is far easier than treating it, and it starts with airflow. Ensure your incubation container has small ventilation holes and isn’t misted directly. If you do see fuzz, lightly dab the area with a cotton bud dipped in a diluted hydrogen peroxide solution (one part peroxide to ten parts water), then let the ootheca dry in a well-ventilated spot.
Molting problems are particularly stressful during breeding, as adults may be less agile. A mantis getting stuck in its old skin is often a sign of humidity being just a touch off. For nymph-bound oothecae, maintaining a consistent, species-appropriate humidity is key. For your adult breeders, provide a textured ceiling or branch they can hang from easily. If a mantis does struggle, resist the urge to help pull-instead, use a fine mist of lukewarm water to soften the old exoskeleton.
- For mites: Isolate the affected mantis, deep-clean the habitat with hot water, and introduce predatory hypoaspis mites as a natural, gentle treatment.
- For fungal growth: Increase ventilation around oothecae, avoid over-misting, and if needed, apply a mild antifungal like diluted chamomile tea with a Q-tip.
- For molting issues: Boost humidity slightly before an expected molt by misting the enclosure walls, and always ensure plenty of climbing space at the top.
Ethical Breeding Practices and Welfare Considerations
Breeding mantises is a wonderful responsibility that extends far beyond a successful mating. Ethical breeding means thinking ahead to the lives of every nymph and prioritising the well-being of your adult pair above all else. In line breeding and selective breeding for mantises, an ethical guide helps you choose matings that protect health and diversity. It is a practice in patience and preparedness, much like planning for a new batch of seedlings in the greenhouse.
Responsible breeding begins long before the adults are introduced. You must have a clear plan for housing and feeding dozens, sometimes hundreds, of tiny nymphs. We recommend setting up multiple small enclosures with fine mesh for ventilation before the ootheca even hatches. Overpopulation is a real risk-only breed if you have homes lined up with fellow enthusiasts or the capacity to care for them all yourself.
Prioritising mantis comfort is essential. Your breeding pair should be well-fed, calm, and housed in spacious, naturalistic enclosures that reduce stress. Watch for signs of agitation, like frantic pacing or repeated strikes at the glass. With Luna, my Ghost Mantis, I always ensure she has plenty of leafy cover to retreat to, creating a sense of security that makes the entire process smoother.
Not every mating will be successful, and not every ootheca will be fertile. Handle these outcomes with the same care you would a thriving clutch. If a female shows no interest or becomes aggressive, separate the pair immediately-forcing the issue only causes harm. An infertile ootheca can be left in place for a while as it will not hatch, allowing the female to fulfil her natural behaviours, before being respectfully disposed of.
- Plan for nymph homes: Prepare deli cups or small terrariums with fruit fly cultures ready, ensuring you can house the hatchlings without delay.
- Avoid overpopulation: Breed only one ootheca at a time unless you have confirmed, responsible homes for the offspring.
- Prioritise comfort: Provide ample space, hiding spots, and a quiet environment for your breeding pair to minimise stress.
- Handle unsuccessful outcomes: Separate incompatible mates gently, and if an ootheca is infertile, remove it after a few weeks to prevent mould, treating it as a natural part of the cycle.
Common Mantis Queries
What ethical and welfare considerations apply to mantis breeding?
Ethical breeding requires a solid plan for housing and feeding all potential offspring to prevent overpopulation. It also means prioritizing the comfort and well-being of your breeding pair by providing spacious, low-stress environments.
What are common health concerns and pests in mantis breeding?
Common issues include mites, which can hitchhike on feeders, and fungal growth on oothecae from excessive moisture. Proper enclosure hygiene and managing humidity with good ventilation are key to preventing these problems.
What feeding guidelines support reproduction and offspring health?
Increase feeding frequency for gravid females with nutritious, gut-loaded prey to support egg development. For hatchlings, provide daily access to appropriately-sized food like fruit flies to ensure healthy growth and reduce sibling cannibalism.
Your Mantis Breeding Journey: A Quiet Close
True success in mantis breeding comes from observing the subtle signs-like a female’s receptive stillness or a male’s cautious approach-and providing a calm, abundant habitat for the pair. By focusing on their comfort and natural instincts first, you create the safest possible start for the next generation. To translate that into practice, set up the perfect breeding enclosure for mantises. A well-designed space supports natural behaviors and clearer mating cues.
We see caring for these creatures as a lasting promise, one that extends from a single mantis to its potential offspring. Let each experience, whether with a clutch of eggs or a shy nymph, deepen your connection and inspire you to learn more about their quiet world.
Further Reading & Sources
- Breeding mantids | Jenny Read
- Breeding praying mantises | Keeping Insects
- How to Breed Praying Mantis – Time to Breed
- r/mantids on Reddit: Breeding praying mantis tips.
Rowan Hale is a lifelong insect enthusiast who fell in love with mantises for their calm presence, alien elegance, and surprising personalities. After years of keeping and raising a variety of species, Rowan shares practical tips, creative insights, and real-world experience to help others enjoy the quiet magic of mantis care. From setting up the perfect enclosure to understanding their subtle behaviors, Rowan invites readers into a gentle, curious world where every tiny movement feels like a discovery.
Breeding Practices